
AWS Free Tier is legendary for being an option for getting a VM running on the open internet for pennies each month. This can be used for running websites, mail servers, and other low CPU tasks. This article runs through the AWS free tier, specifically for linux.
- Choosing an Instance Type
- Creating a Free Tier VM
- Security Groups
- Setting Up an External IP
- Ssh’ing Into the Instance
- HTTP Connection From the Outside
- Creating Alerting For Billing
Choosing an Instance Type
Here is a break down of free tier options.
t4g.small is a bit more powerful, but it isn’t available in the region I am looking at (us-east-2). t3.micro is available in this region but it isn’t free tier in this region. So, I’m going with t2.micro.
Creating a Free Tier VM
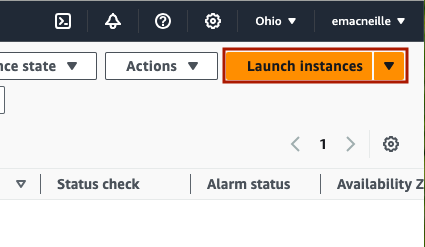
Now, log into your AWS account and navigate to ec2 (here for us-east-2). If you want a different region, you can modify the URL parameter ‘region’. In the upper right, click ‘Launch instances’.
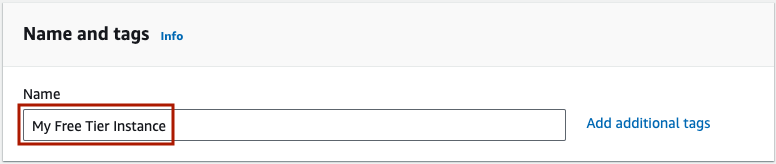
Give the VM a meaningful name, for example ‘My Free Tier Instance’.
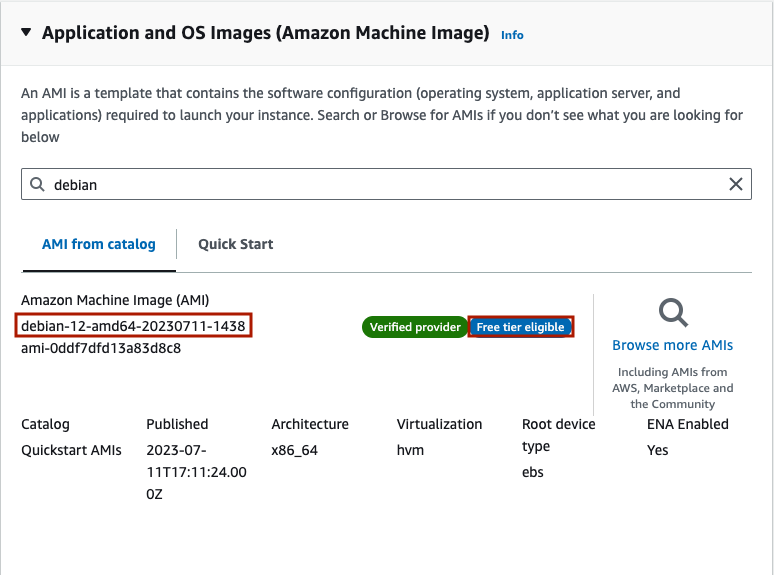
For Amazon Machine Image (AMI), I am choosing Debian 12, 64-bit (x86), which is a flavor of Linux similar to Ubuntu but with less overhead. Note that it is labeled as ‘Free tier eligible’.
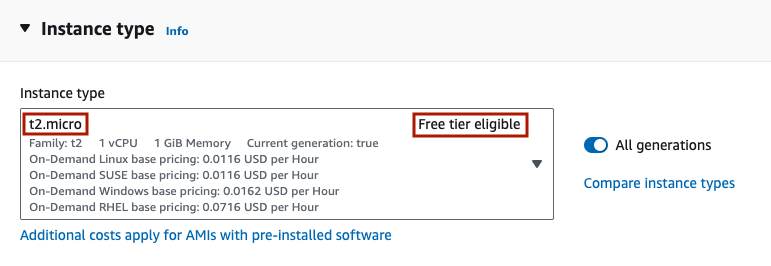
For Instance type, choose ‘t2.micro’. Note that it is labeled as ‘Free tier eligible’.
For ‘Key pair (login)’, if you don’t already have an ssh key for AWS, create one now.
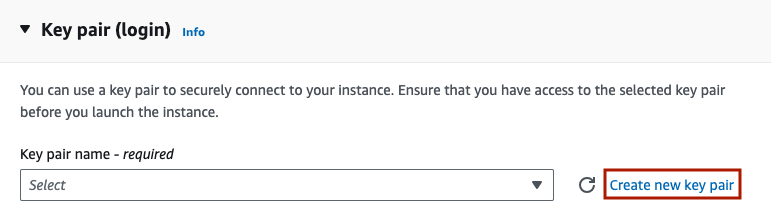
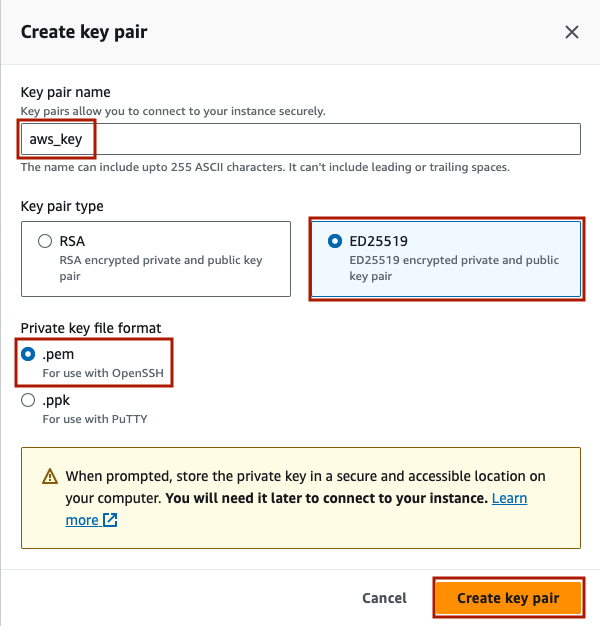
A popup will come up titled ‘Create key pair’. Give the key a name without spaces such as ‘aws_key’. I recommend ED25519 over RSA. Finally, select ‘.pem’ for linux style command line ssh sessions. Finally, hit ‘Create key pair’.
As soon as you press this, the key will be downloaded via your browser. It is important to store this is a protected location with restricted permissions. The traditional choice for unix based systems is to store ssh keys in ~/.ssh. On Mac or Linux, you can run the following in your terminal.
cp ~/Downloads/aws_key.pem ~/.ssh
chmod 400 ~/.ssh/aws_key.pem
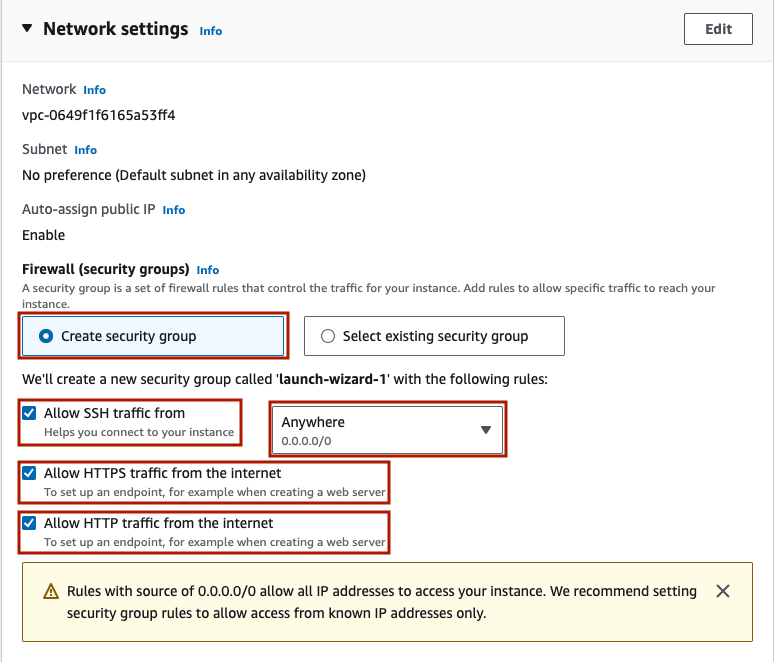
Back to the ec2 instance. Under ‘Network Settings’, if you don’t already have a security group, create one. You have some options, and these can always be changed later. For this demo I will choose:
- Allow SSH traffic from Anywhere
- Allow HTTPS traffic from the internet
- Allow HTTP traffic from the internet
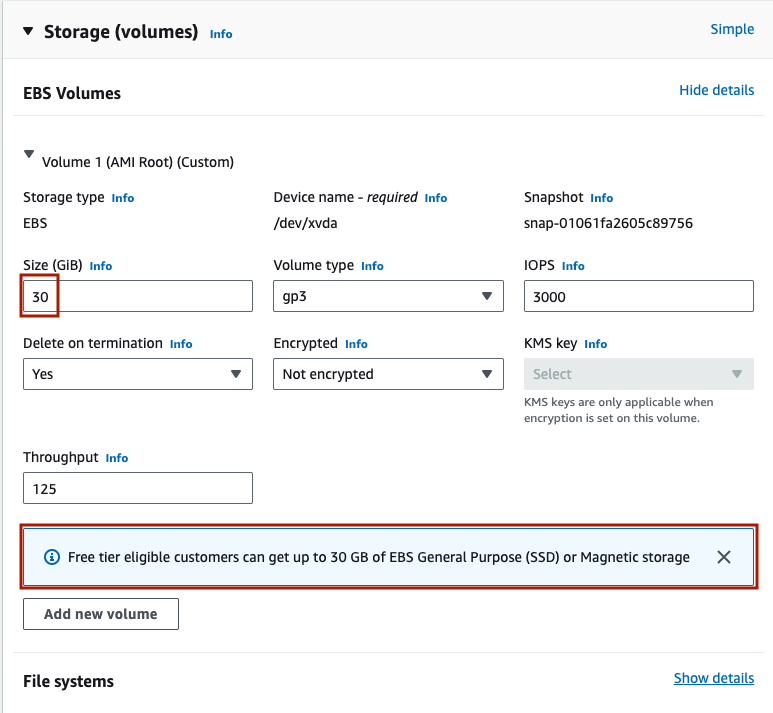
Under ‘Storage (volumes)’, note that you can choose up to 30 GiB of EBS under free tier. All the other default settings are fine as they are. There is no need to modify ‘File systems’.
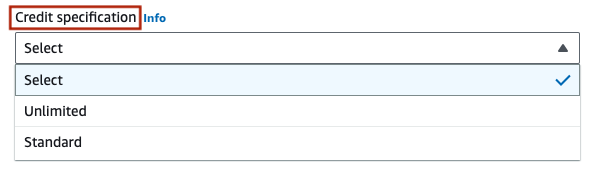
Under ‘Advanced details’, there is no need to modify anything, but I want to point out an important setting, ‘Credit Specification’. The default is ‘Standard’ meaning that once you run out of CPU credits, the VM will stop running, until more credits are produced hourly. This means that your website will stop responding, and you won’t even be able to ssh into the VM. If you don’t mind potentially paying for extra CPU credits, and you want to ensure your services are always running, change this setting to ‘Unlimited’.
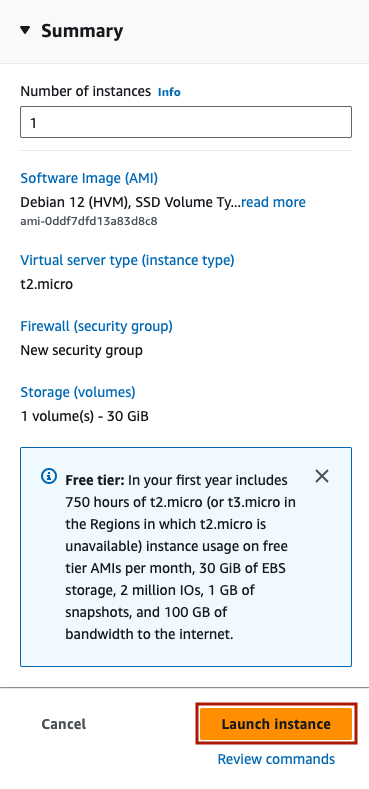
Finally, look at ‘Summary’ on the right hand side. If everything looks good, hit ‘Launch instance’
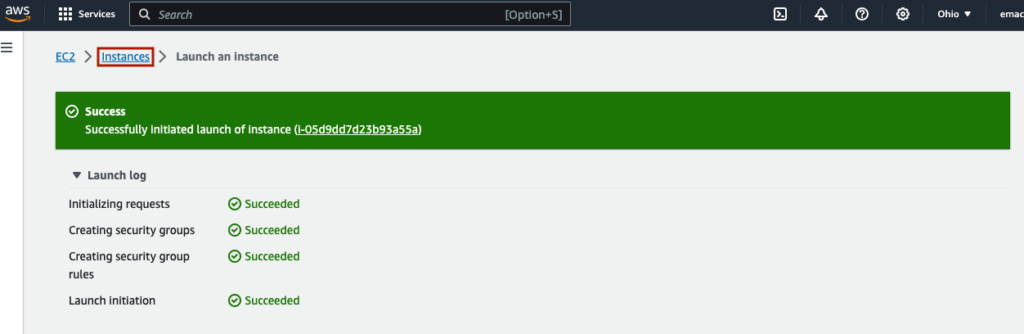
You will see a loading screen, and then a green ‘Success’ banner. Click on ‘Instances’ to see your instance.
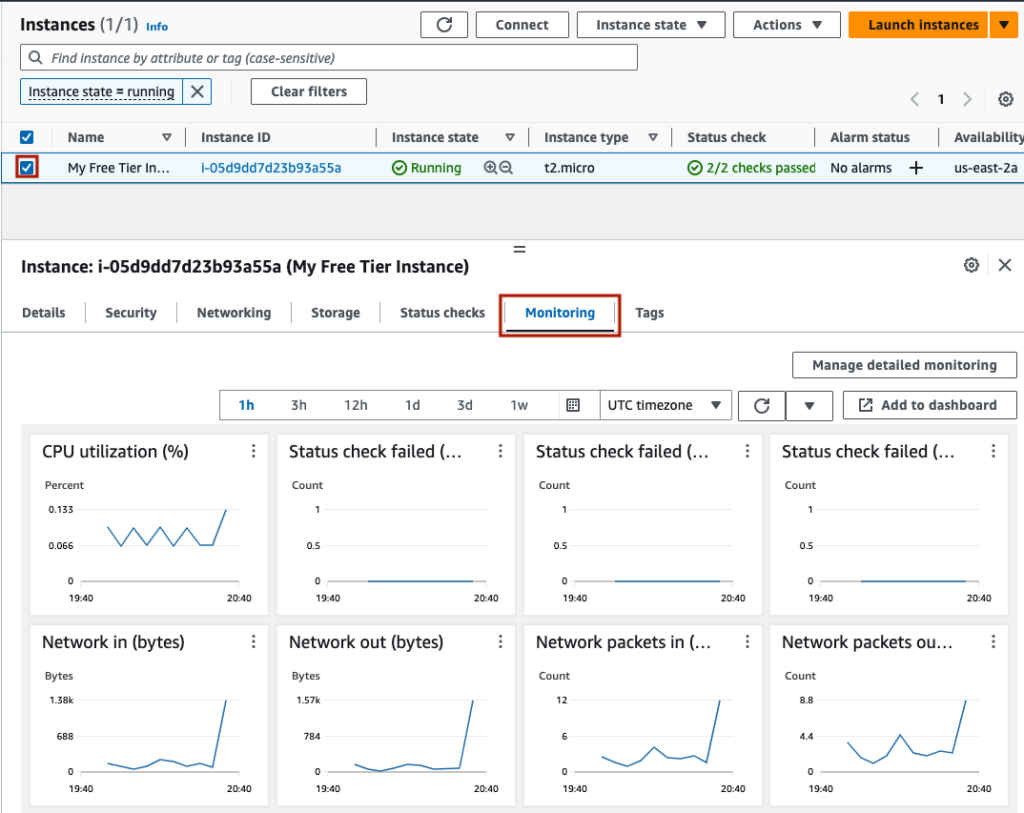
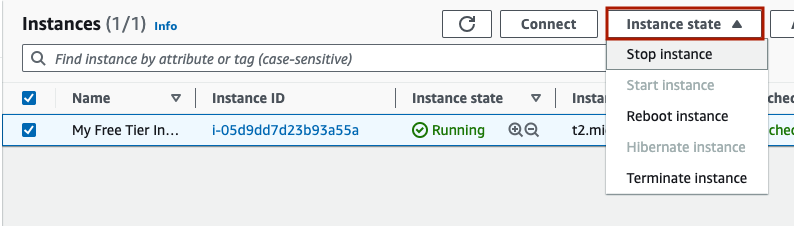
You will see your instance with an Instance state of ‘Running’. If you check the instance’s checkbox, you will see a menu at the bottom of the screen, with some options, including monitoring. Here is one way to see CPU utilization, Network I/O, Disk I/O, and CPU credits used and remaining.
If you ever want to stop or terminate the instance, you can do this under the ‘Instance State’ menu.
Security Groups
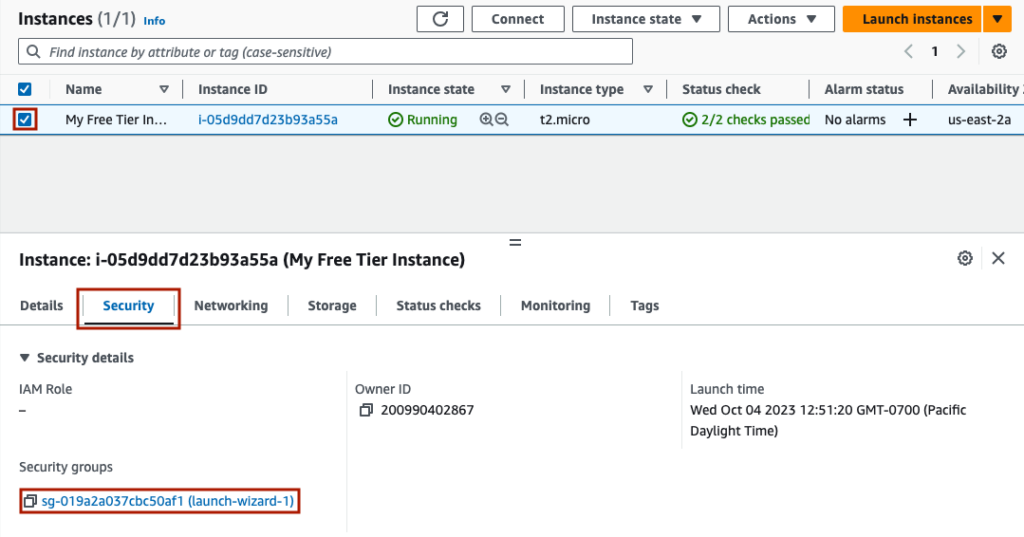
Security Groups in AWS determine which protocols from which IPs to which ports will be allowed into your instance. It is important to make these as restrictive as possible to ensure that bad actors cannot take over your instance. I will now modify the instance’s security group. First, I select the instance, and toggle to the ‘Security’ menu item, and click on the only security group.
Now, click ‘Edit inbound rules’.
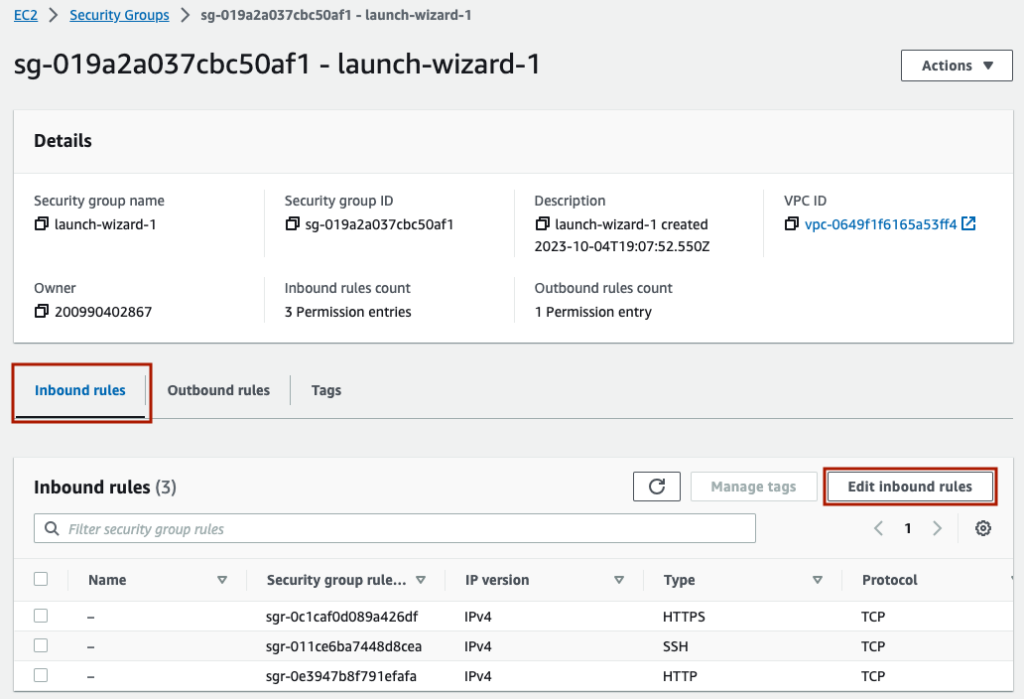
I am adding a rule to allow for ‘ICMP – IPv4’ from all locations. This will allow others to run a ‘ping’ command against this instance. This is done by clicking ‘Add rule’, choosing the type, choosing the IP range, and optionally adding a Description. Finally, click ‘Save rules’.
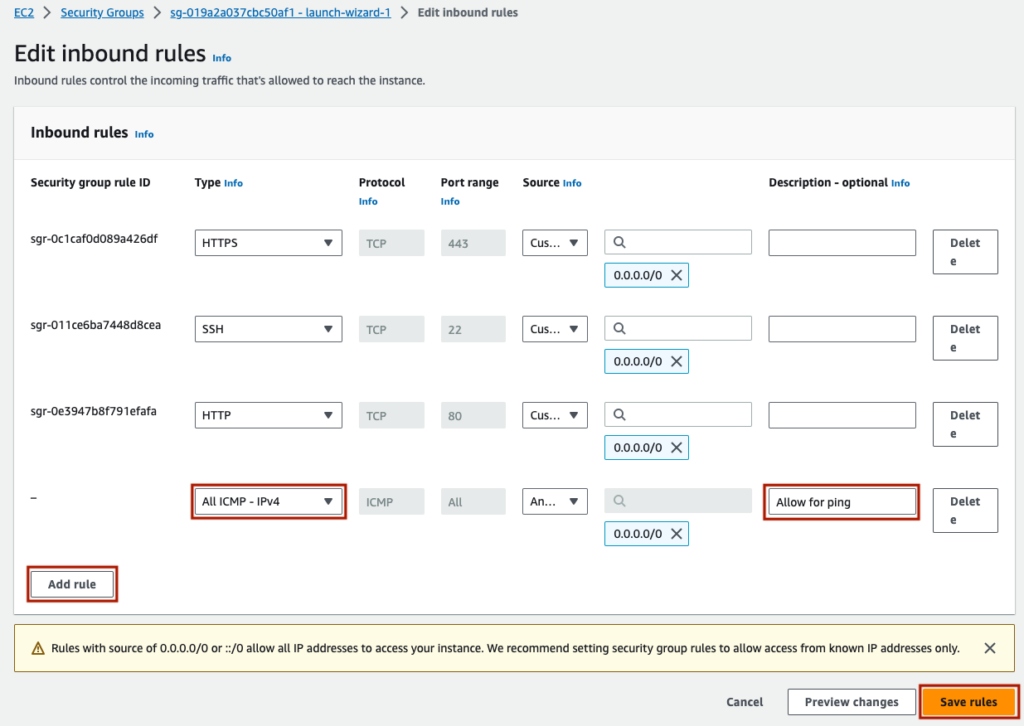
There may be other rules you want to change/modify over time, and this is the place to do it.
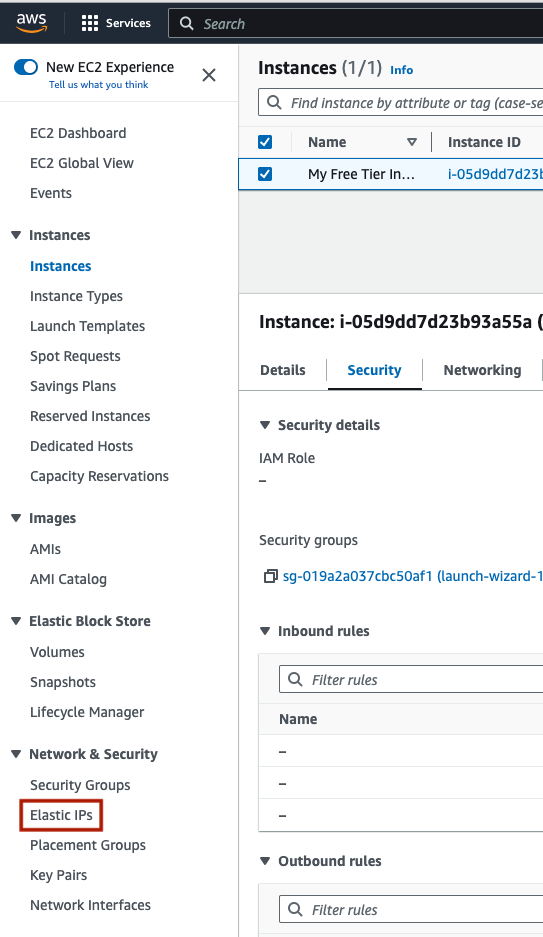
Setting Up an External IP
If you ever stop your ec2 instance, it will not have the same IP address when it is started again. This means you will need to manually update your DNS or load balancer. For this reason it makes sense to allocate an Elastic IP which can be associated and reassociated with different ec2 instances. This will also help if you are ever migrating your services to a bigger VM. Note that Elastic IPs are completely free, as long as they are associated with an instance. Otherwise, AWS charges you as a way to incentive not being wasteful with resources. On the left had side menu, under ‘Network & Security’, click on ‘Elastic IPs’.
In the upper right, click ‘Allocate Elastic IP address’.
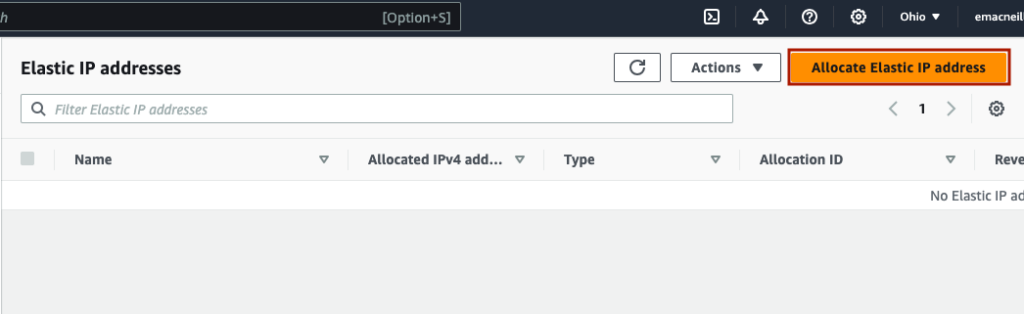
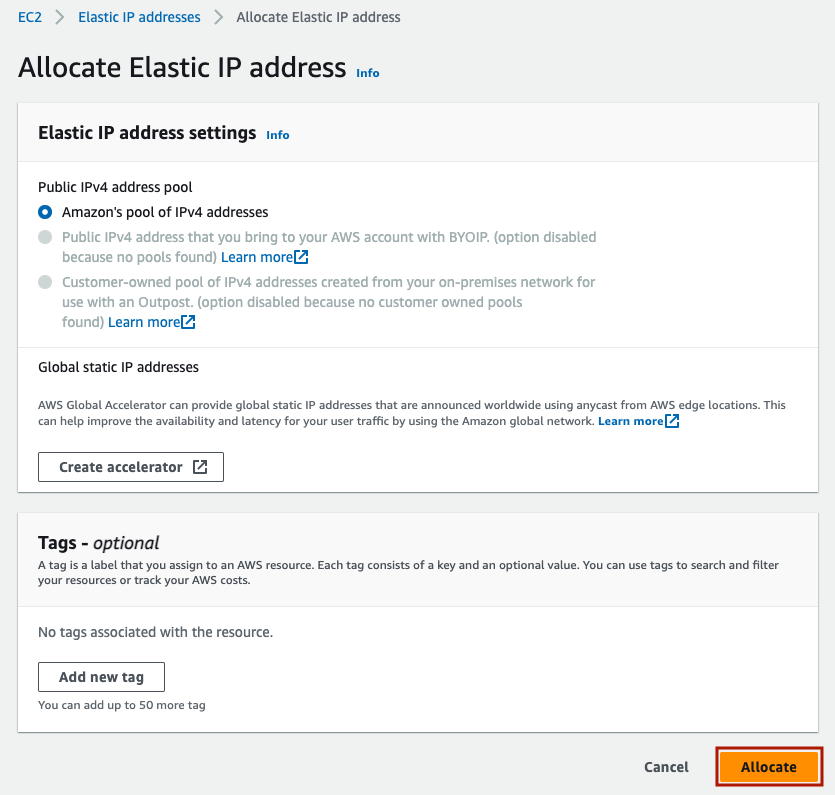
On the next screen, simply press ‘Allocate’.
You should see a green success banner and a new elastic IP. Go to ‘Actions’ -> ‘Associate Elastic IP address’.
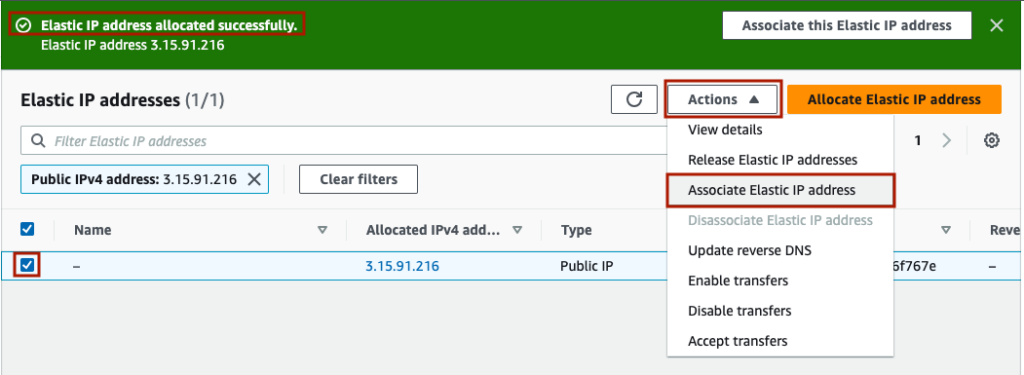
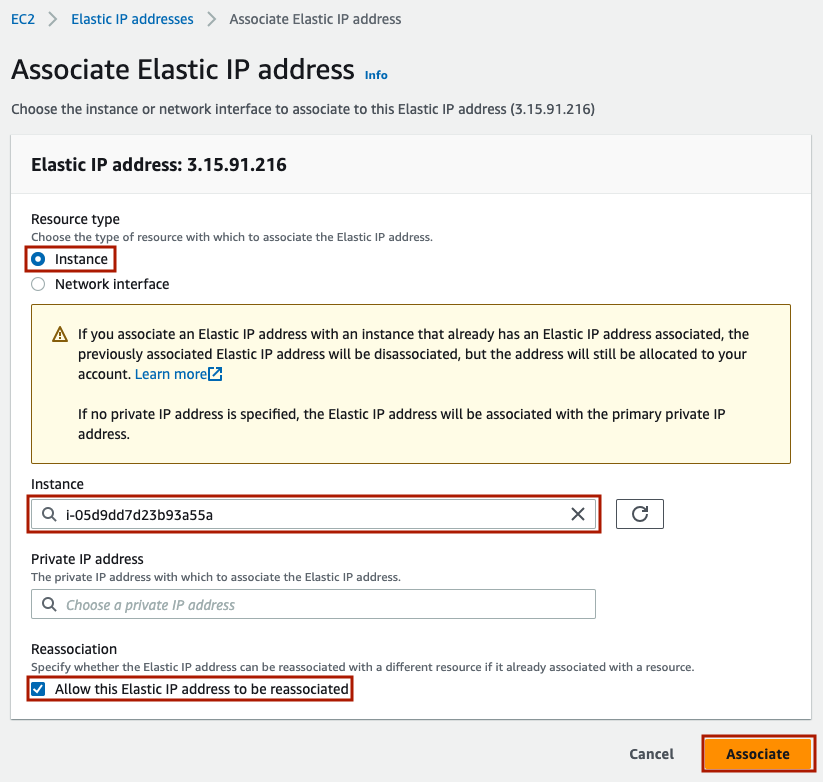
In the next screen, keep resource type as ‘Instance’. Under Instance, choose your VM. Finally, select ‘Allow this Elastic IP address to be reallocated’. This will mean you can migrate your services to a new VM without updating DNS. Finally, press ‘Associate’.
Finally, be sure to copy your Elastic IP address to a separate text editor for use later on. This will be useful for ssh’ing into the instance, visiting the VM over HTTP(s), and pointing DNS to this VM for any domains you may want to.
Ssh’ing Into the Instance
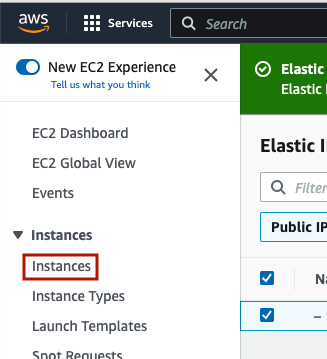
Now, to ssh in and actually begin installing and running your services. First, click ‘Instances’ under ‘Instances’ on the left hand menu, to navigate back to your ec2 instances.
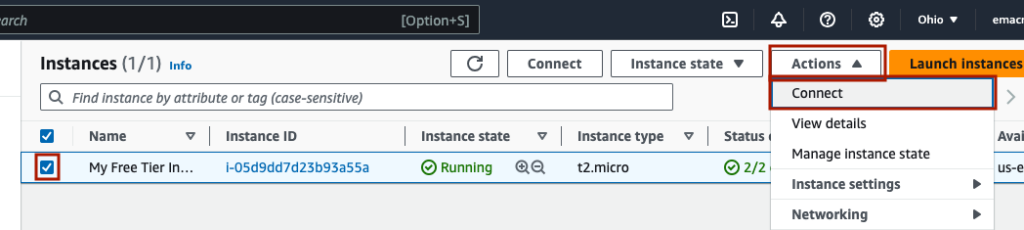
Select the instance, and under ‘Actions’, click ‘Connect’.
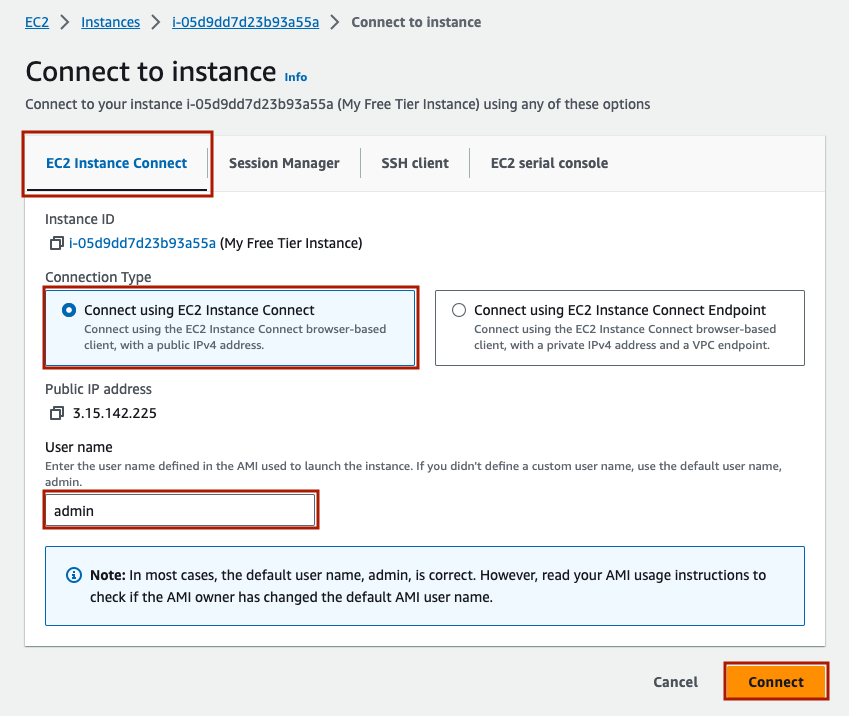
The first way to connect is via ‘EC2 Instance Connect’ which is an ssh terminal in your browser. This is the easiest way to start, but it isn’t as reliable, and it can be frustrating as the UI can freeze and need to be restarted. Note the pre-filled in User name; this is what we will use to ssh in to the instance later. To launch, click ‘Connect’.
The in browser terminal will appear as a new tab.
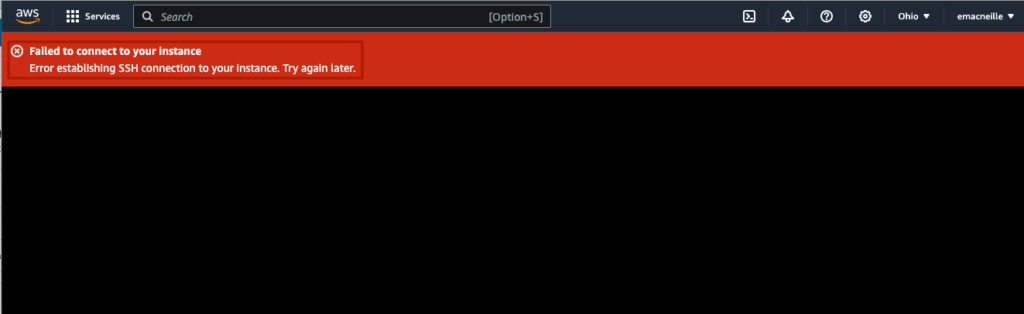
I wasn’t able to figure out why I wasn’t able to connect in this case. I double checked security groups, the ssh username and IP, but to no avail. If I was truly stuck, I would do more research and possibly create a support ticket with AWS. Fortunately I can ssh into the instance using my AWS .pem ssh key. Open up Terminal on your Mac or Linux computer. Noting we already moved our ssh key to ~/.ssh/aws_key.pem, and that the default user for debian is ‘admin’, the command is
ssh -i ~/.ssh/aws_key.pem admin@<Elastic IP Address>
You will be prompted as follows. Enter ‘yes’ and hit return.

Finally, you should be looking at a terminal with an active SSH session into your AWS VM. Now we can check a few things. First, let’s check the available RAM.
free -h

Free is showing close to 1 GiB of RAM as promised. One thing to note is that there is no swap. Enabling swap is is a good idea to prevent OOM kills if requested RAM exceeds what is available. Next, let’s looks at disk space.
df -h
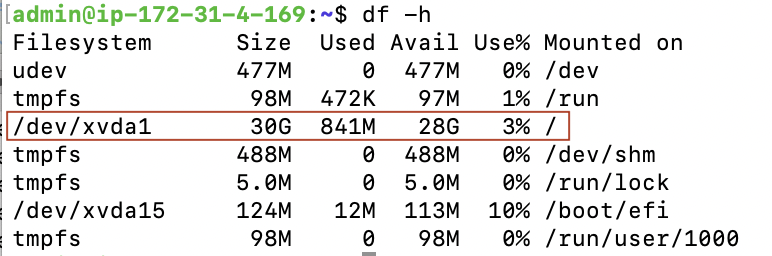
DF is showing a 30 GiB drive connected as expected. All is well here. Finally, let’s look at CPU count.
lscpu | grep '^CPU(s)'

lscpu is showing 1 CPU as expected.
HTTP Connection From the Outside
In order to run a website, we need visitors to be able to connect to our VM. An easy way to validate this is by running a simple http server in python, and then curling that server from the outside. Note that port 80 (Inbound HTTP) should be open from our security group configuration earlier. First, make sure you are in a directory without and sensitive information. To be sure, let’s create a new directory and navigate to it.
mkdir ~/test_server
cd ~/test_server
pwd
Now start the server.
sudo python3 -m http.server 80

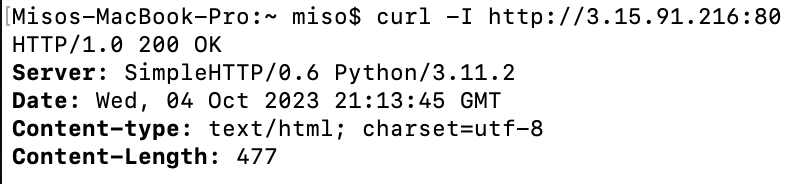
The server started successfully. Now, from a terminal window on your local machine, run the following.
curl -I http://<Elastic IP Address>:80
Two things should happen. In the window you just entered the command, you should see a 200 Response like this.
In the window that is ssh’d into the AWS VM, you should see the request logged, including the public IP of the machine you requested from.

This is proof that you have been able to connect to an application running inside of your VM. If you are done testing, close down the python server with ‘Ctrl + c’.
Creating Alerting For Billing
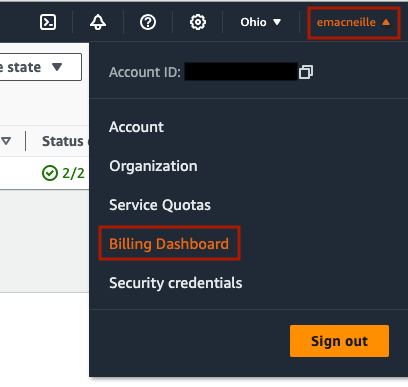
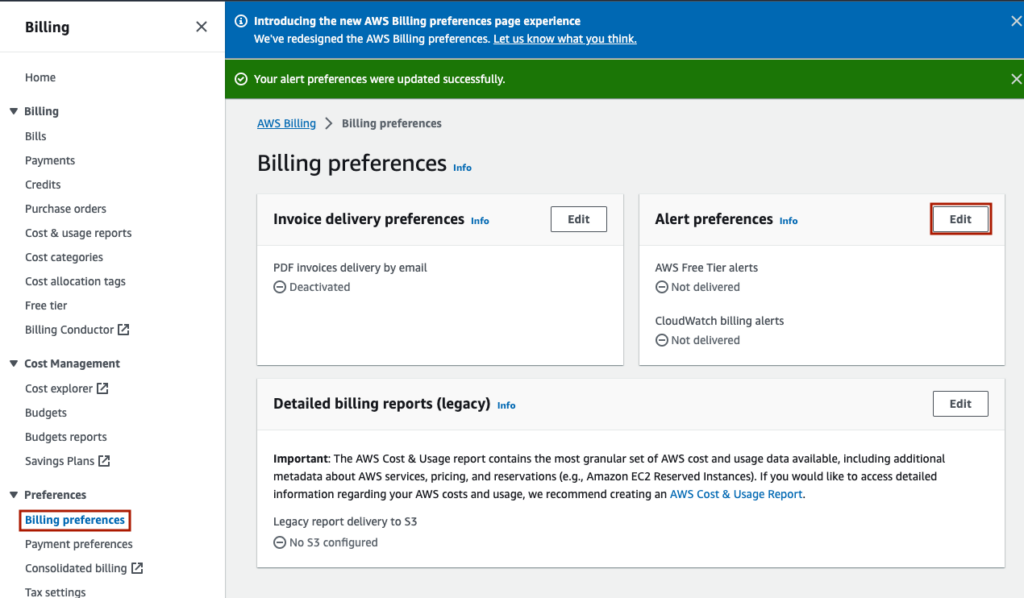
AWS is notorious for having unexpected costs. Their billing reports have 100s of line items, and it isn’t uncommon to be in for a surprise you first month using a new product. For example, data transferred to the outside internet (egress) costs $0.01 / GB. Fortunately we can enroll in billing alerts, which will let us know how we are pacing and give us a chance to shut things off if spend is going up unexpectedly. First, in the upper left, click on your username -> ‘Billing Dashboard’.
On the left hand menu, under ‘Preferences’ -> ‘Billing preferences’, you can choose to receive AWS Free Tier alerts by clicking ‘Edit’ on ‘Alert preferences’.
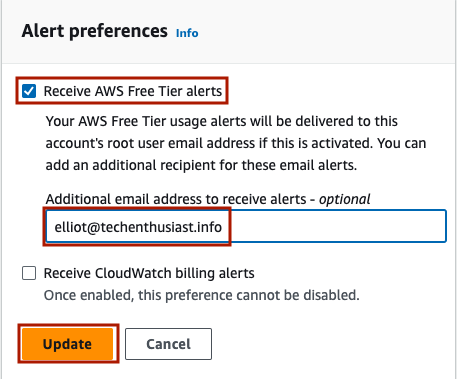
Select ‘Receive AWS Free Tier alerts’, enter your email, and click ‘Update’
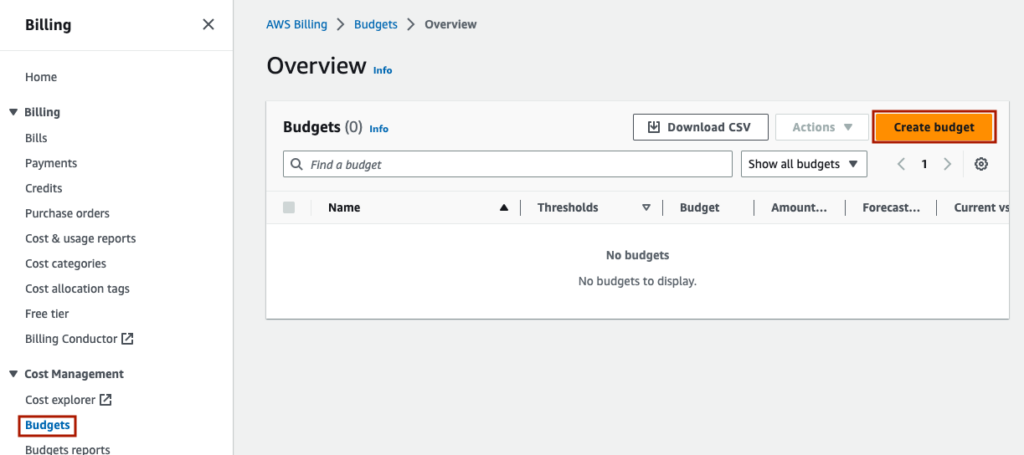
Secondly, we can create a budget and alert based on the amount of budget used and forecasted to be used. To do this, click on ‘Cost Management’ -> ‘Budgets’ on the left hand side menu, and click’ Create budget’.
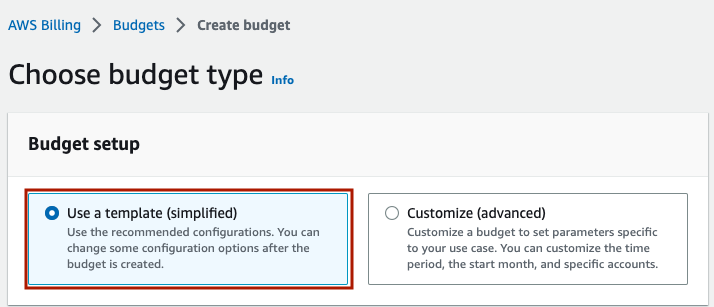
Under ‘Budget setup’, you can keep the setting ‘Use a template (simplified)’.
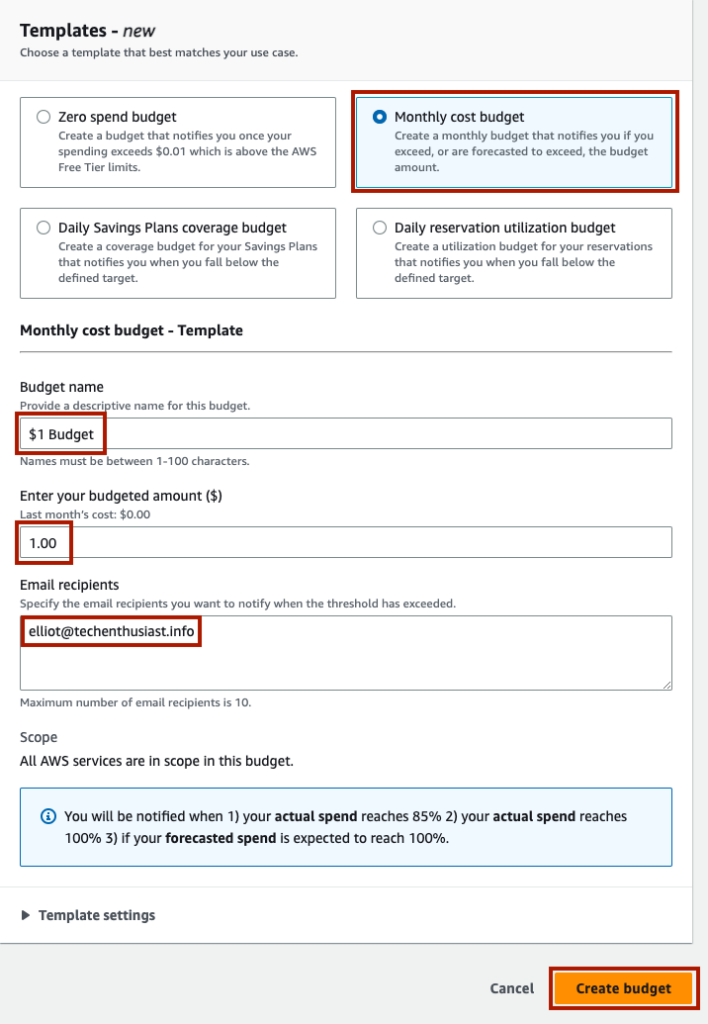
Under Templates, choose ‘Monthly cost budget’. Give the budget a meaningful name, and set the amount to ‘1.00’. Finally, put your email in the ‘Email recipients’ field. Finally, click ‘Create budget’.
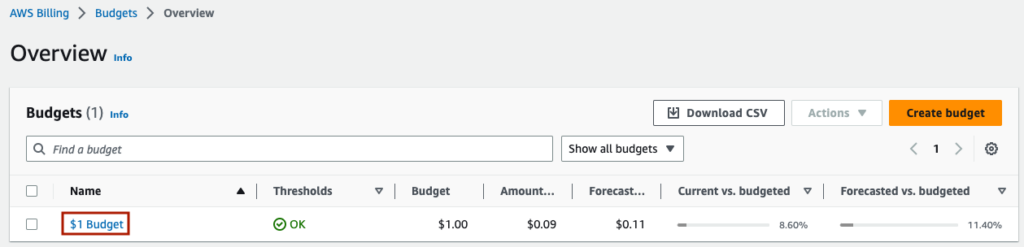
You will see the budget created. Click into it by clicking on the ‘Name’ link.
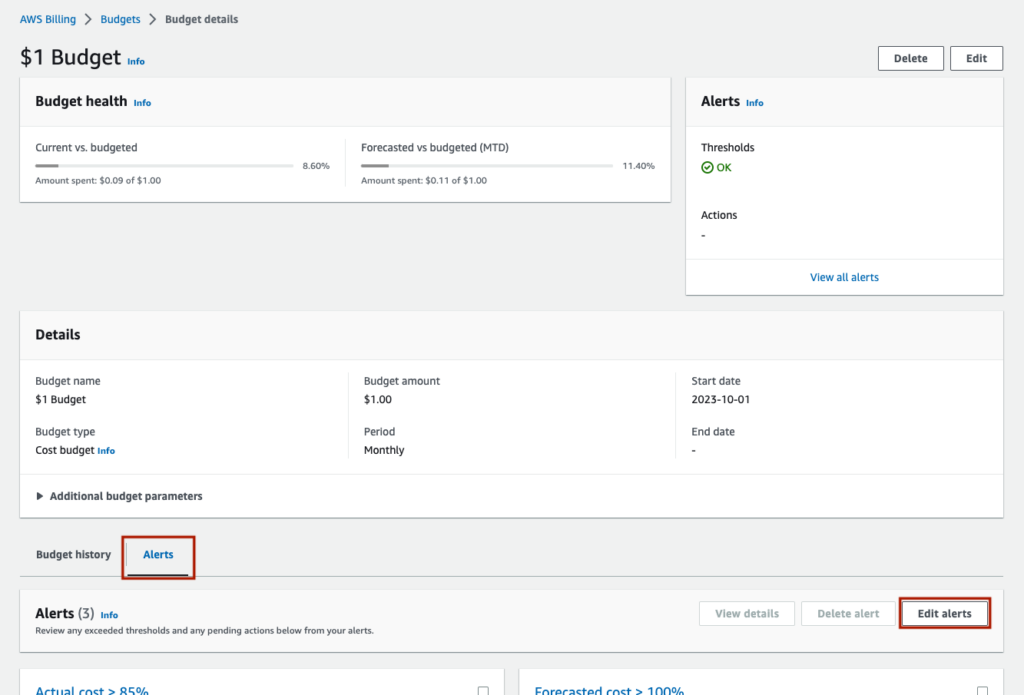
In the lower menu, click ‘Alerts’ and then ‘Edit alerts’.
There are three alerts currently,
- Exceeded 85% of budget
- Exceed 100% of budget
- Forecasted to exceed 100% of budget
Scroll down and click ‘Add alert threshold’.
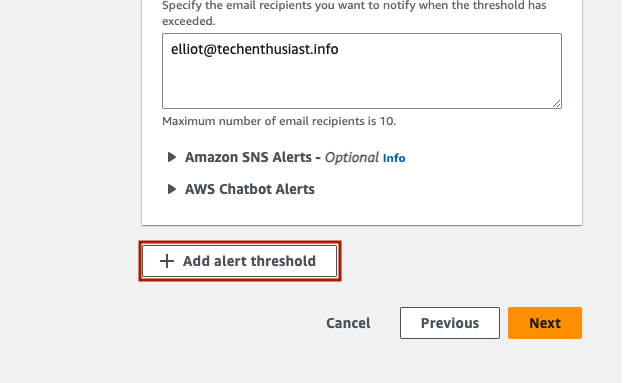
Set the threshold to 10% of budgeted amount. This will alert you if your monthly spend has exceeded $0.10. Be sure to add your email under ‘Email recipients’. Finally, press ‘Next’.
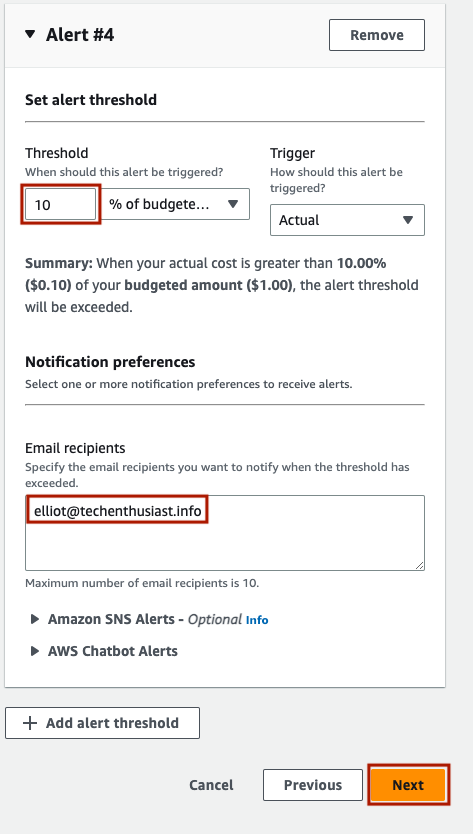
Scroll down and hit ‘Next’ again.
Finally, scroll down and press ‘Save’.

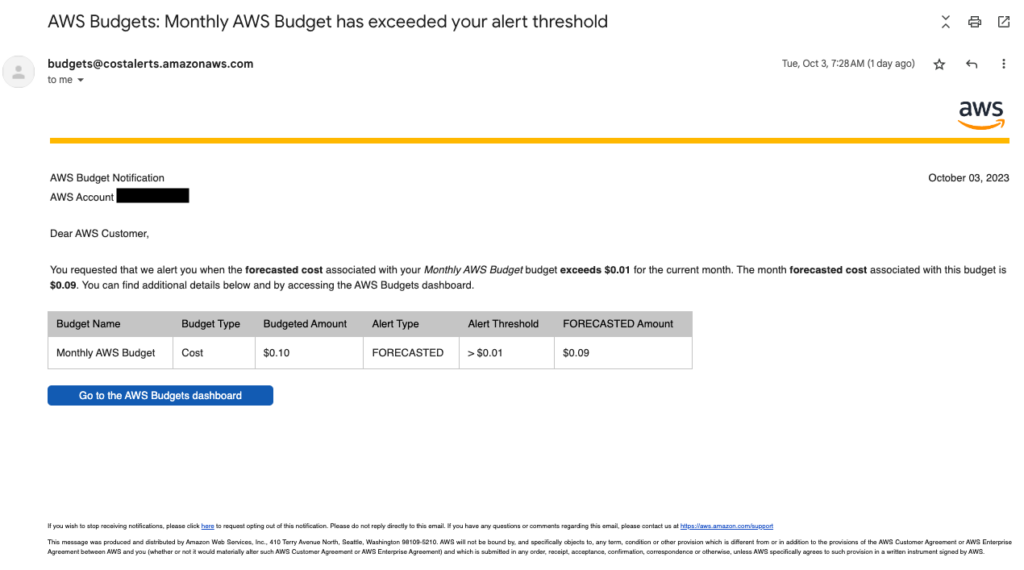
Here is an example of an alert email notification for a threshold of $0.01.
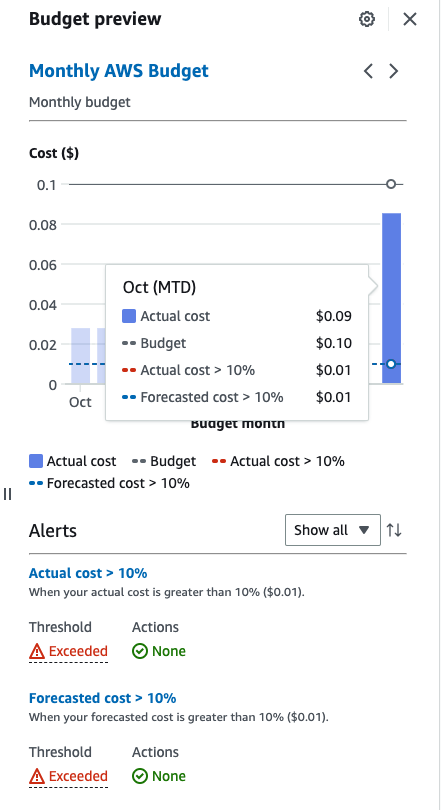
Here is what the budget reporting looks like for budget of $0.10, an alert threshold of $0.01, and a spend of $0.09.
Leave a Reply