
If you are interested in running a compute project for the absolute cheapest price possible, you may decide to use old desktop computers and configure them to run as servers on premises. Right now you can get renewed HP Elite 800 G1 SFF Business Desktops on Amazon for ~$115 with some decent specs:
- Intel Core i7-4770 with 3.40 – 3.90 GHz, 4 cores, and CPU threading
- 16 GB RAM
- 2 TB HDD
And while the computer comes with Windows installed, worry not, we can install Debian Linux without ever booting up Windows. There are a few ways to configure these computers that is different than a typical Desktop computer, so that we will get some of the following behaviors:
- After a power outage, the server should automatically turn on
- Upon boot, automatically log in to the main user and begin running services
- Always get the same local network IP from the local router using DHCP so inbound traffic can reach these services
- Forward inbound traffic on specific ports from your router to the server
These behaviors will ensure that you can leave the computer running in your closet and go on vacation and not need to manually intervene, except in extreme cases like a disk failure. In this tutorial we will be using the following tools:
- An HP EliteDesk 800 G1 SFF Desktop computer
- A TP-Link Archer A-7 Ethernet Router
- A USB with your favorite flavor of linux as a flash ISO
And, we will go through the following steps:
- HP BIOS Settings
- Install Linux From USB
- Enable Auto Login and Disable Hibernation
- Router DHCP and Port Forwarding
- Dynamic DNS
- Manual Intervention
HP BIOS Settings
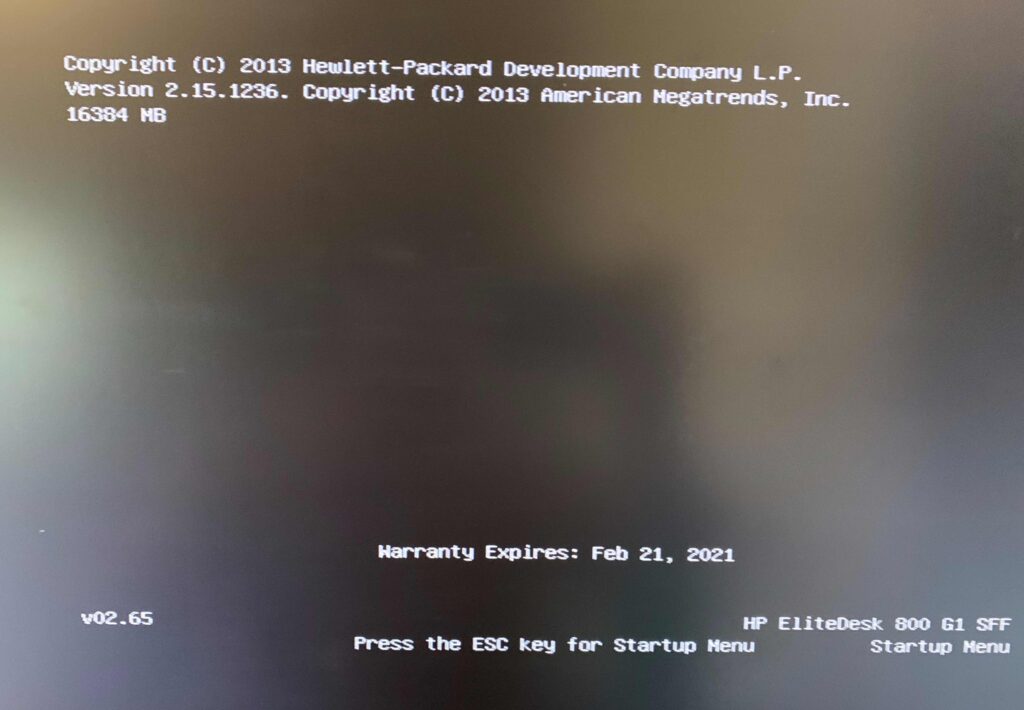
When booting up the HP machine, hold the ‘esc’ key to enter the BIOS startup menu. Initially you will see this screen.
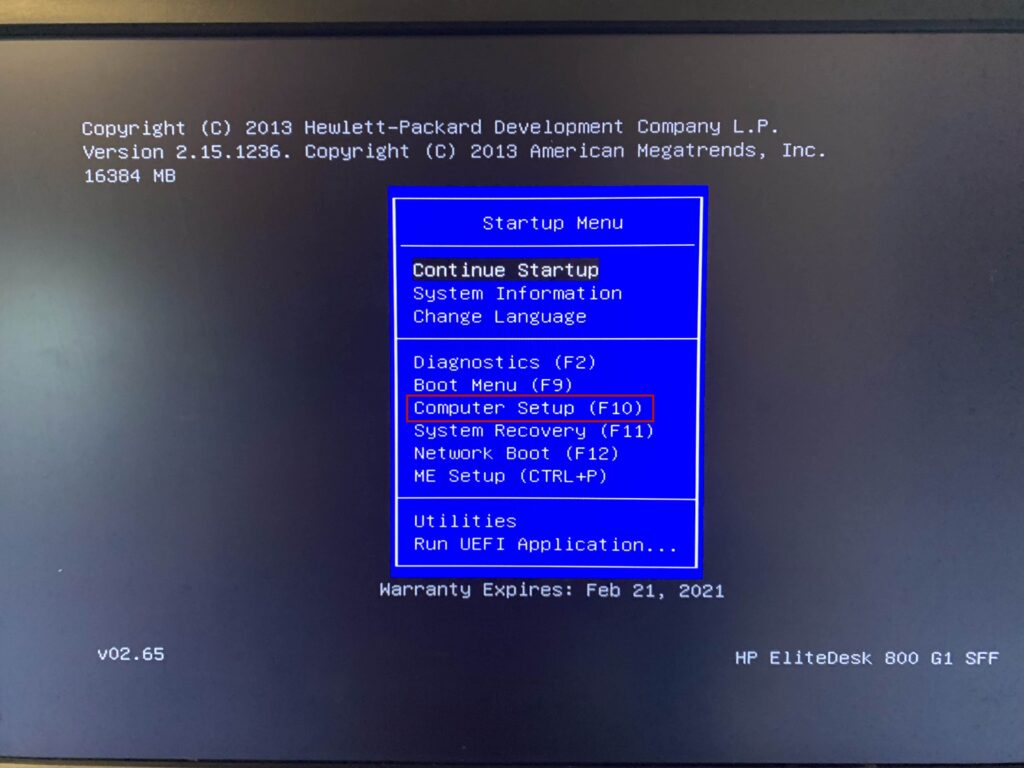
And then you will be shown the Startup Menu, which is a blue box with a set of options and a black background. Press ‘F10’ for ‘Computer Setup’.
You will now be in the computer setup menu. You can use the keyboard arrows and the ‘Enter’ key to navigate. First, we aren’t 100% sure how this computer has already been configured, so I recommend going to ‘File’ -> ‘Default Setup’ and selecting ‘Restore Factory Settings as Default’. Hit ‘Enter’ to accept.

A green window will pop up confirming that factory settings have been restored. Hit ‘Enter’ to proceed.

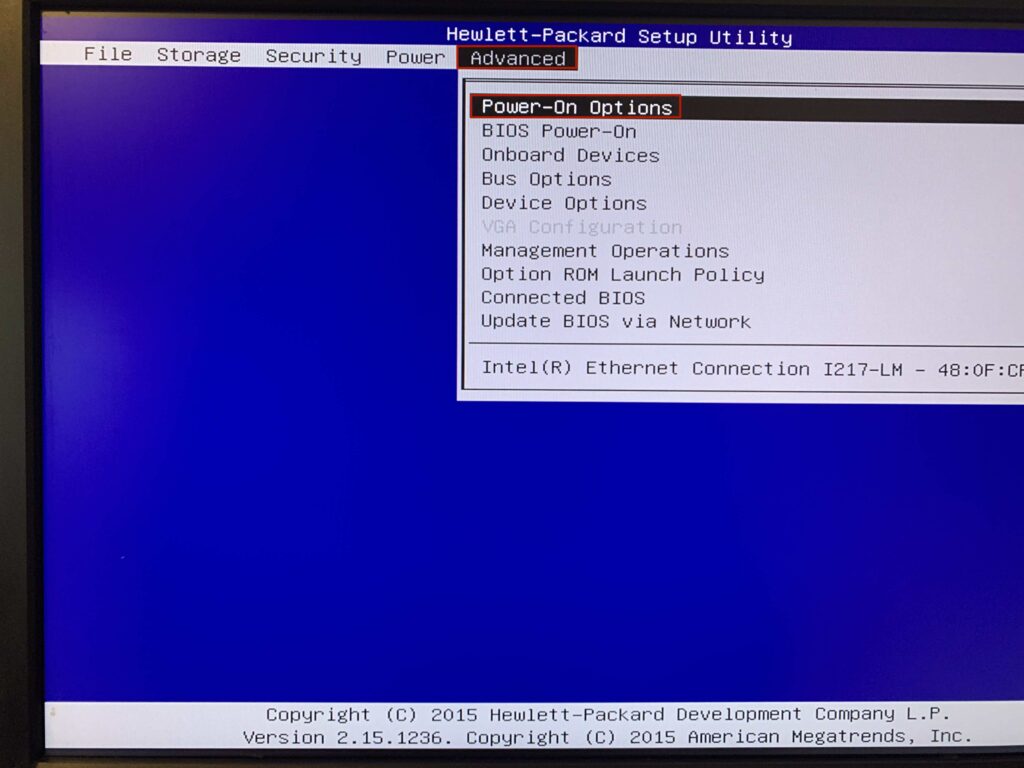
Press ‘esc’ to exit the ‘Default Setup’ section. Navigate over to ‘Advanced’ -> ‘Power-On Options’ and hit ‘Enter’ to bring up the Power On options.
Modify ‘After Power Loss’ from ‘Off’ to ‘On’ and set ‘Bypass F1 Prompt on Configuration Changes to ‘Enabled’. Is should look like this. Press ‘F10’ to accept.

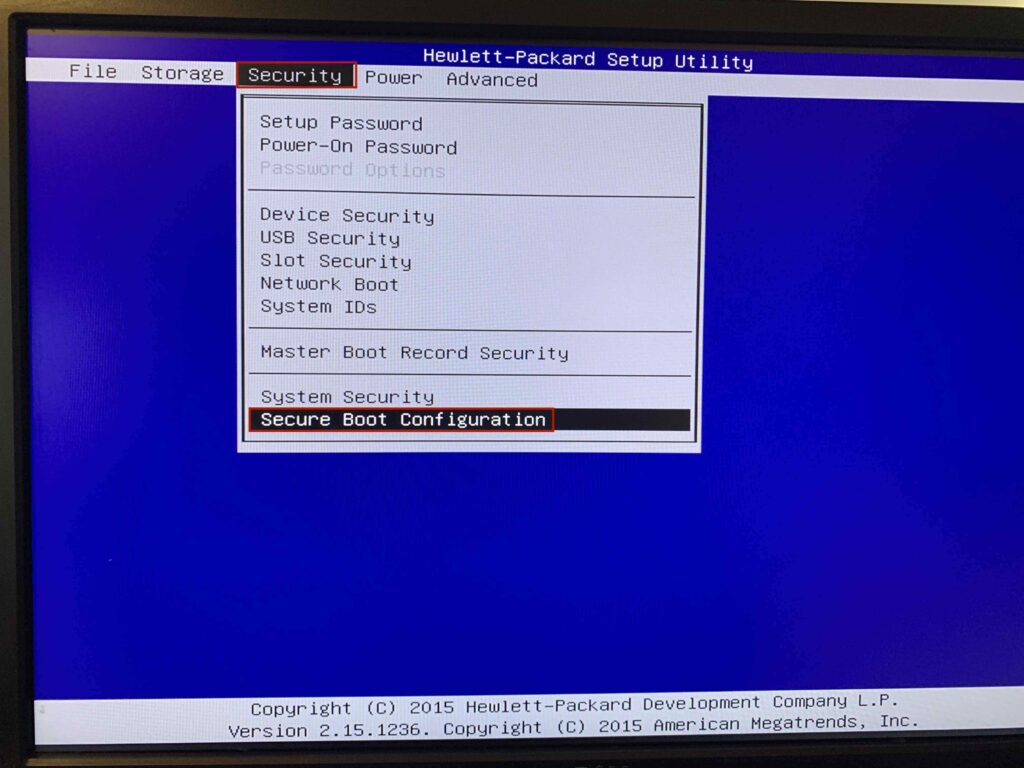
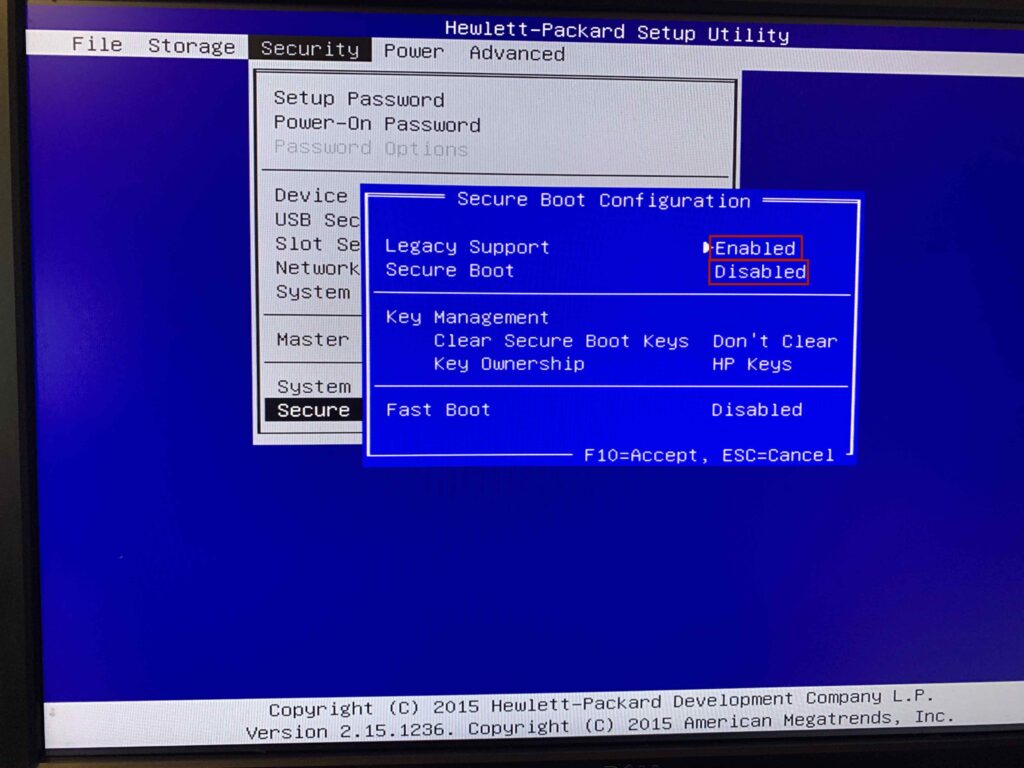
Now, go over to ‘Security’ -> ‘Secure Boot Configuration’ and hit ‘Enter’.
In order to boot from USB, we need ‘Legacy Support’ to be ‘Enabled’ and ‘Secure Boot’ to be ‘Disabled’. This is already set if you restored to factory defaults. You can feel free to revert these settings to more secure ones after installing the Linux OS of your choice. This is more important to do if potentially bad actors have physical access to your machine.
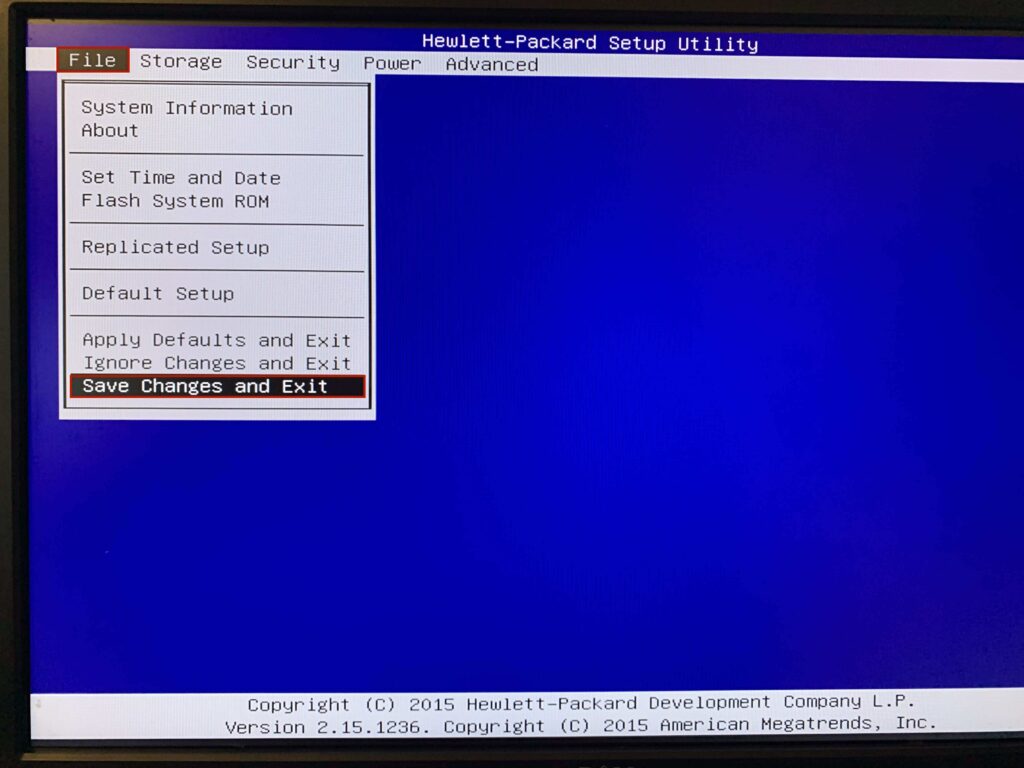
This is all the BIOS settings we need to configure. Go to ‘File’ -> ‘Save Changes and Exit’ and hit ‘Enter’.
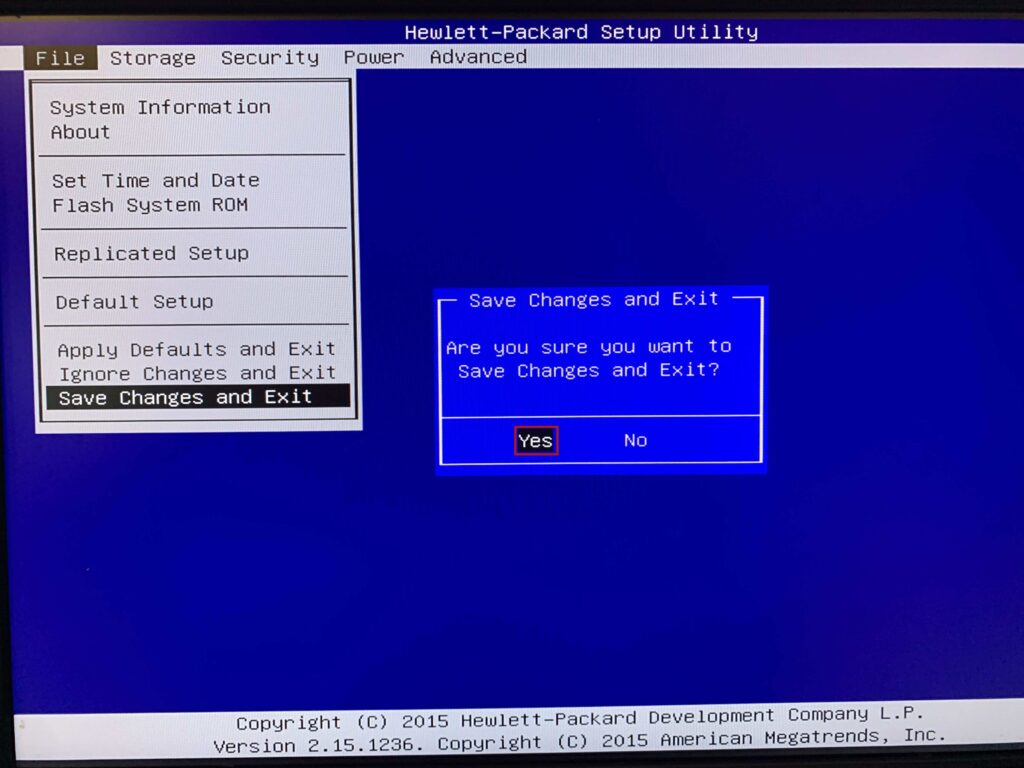
You will be asked if you are sure. While selecting ‘Yes’, hit ‘Enter’.
The computer will reboot. One thing to test is to unplug the computer and plug it back in. You will see it automatically turn on, thanks to the BIOS setting.
Install Linux from USB
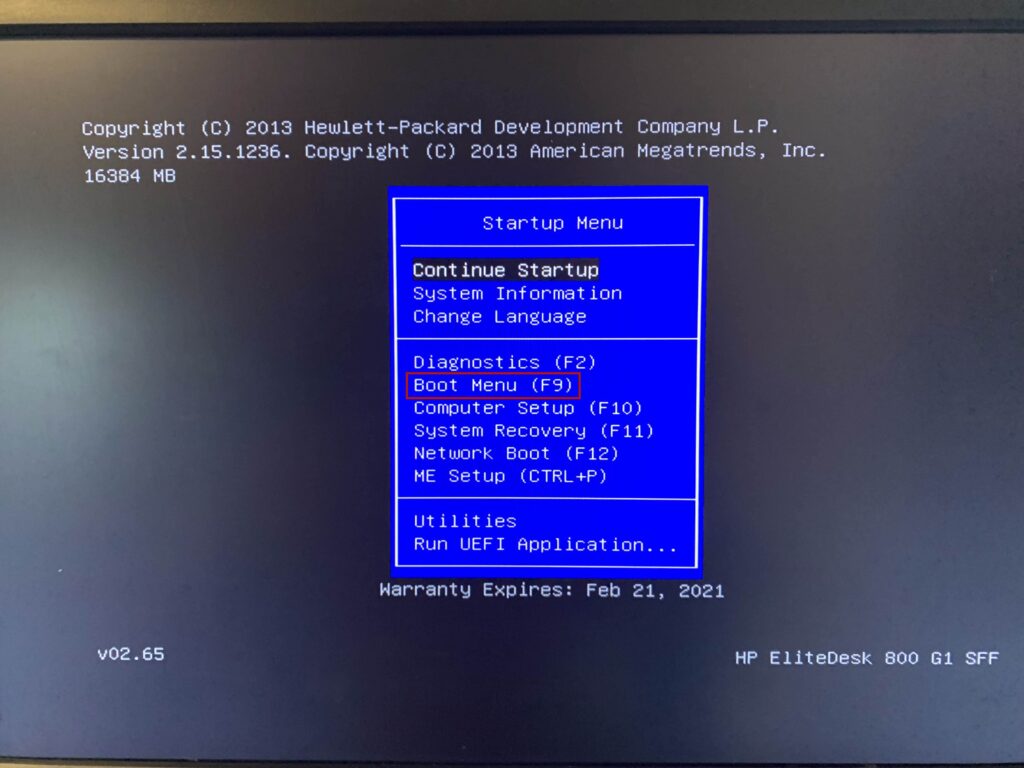
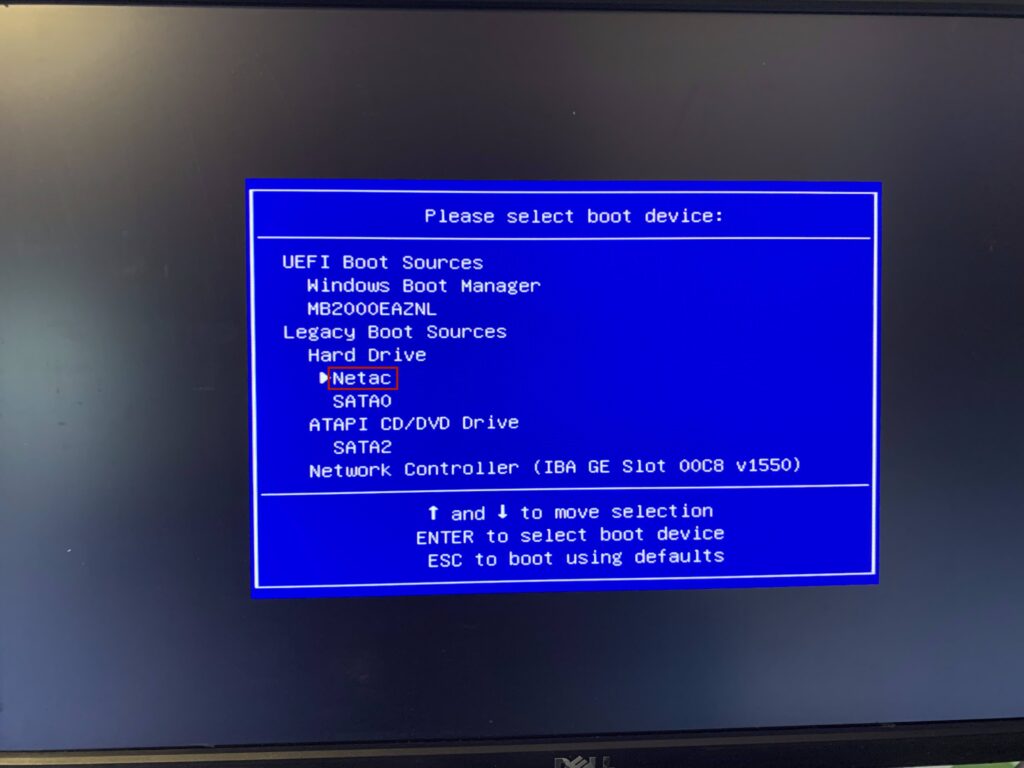
For OS, I am using Debian 12.2.0 which can be downloaded here. You can create a bootable USB flash drive by following the instructions here and using the free software Etcher. Insert your USB drive into the computer while it is turned off, and then press the power button. While the computer is starting up, repeatedly tap ‘esc’ to enter the Startup Menu again. This time, hit ‘F9’ for the ‘Boot Menu’.
You will be prompted to select a device. USB drives are listed under ‘Legacy Boot Sources’. In my case, the relevant USB drive is named ‘Netac’. Select that device and hit ‘Enter’.
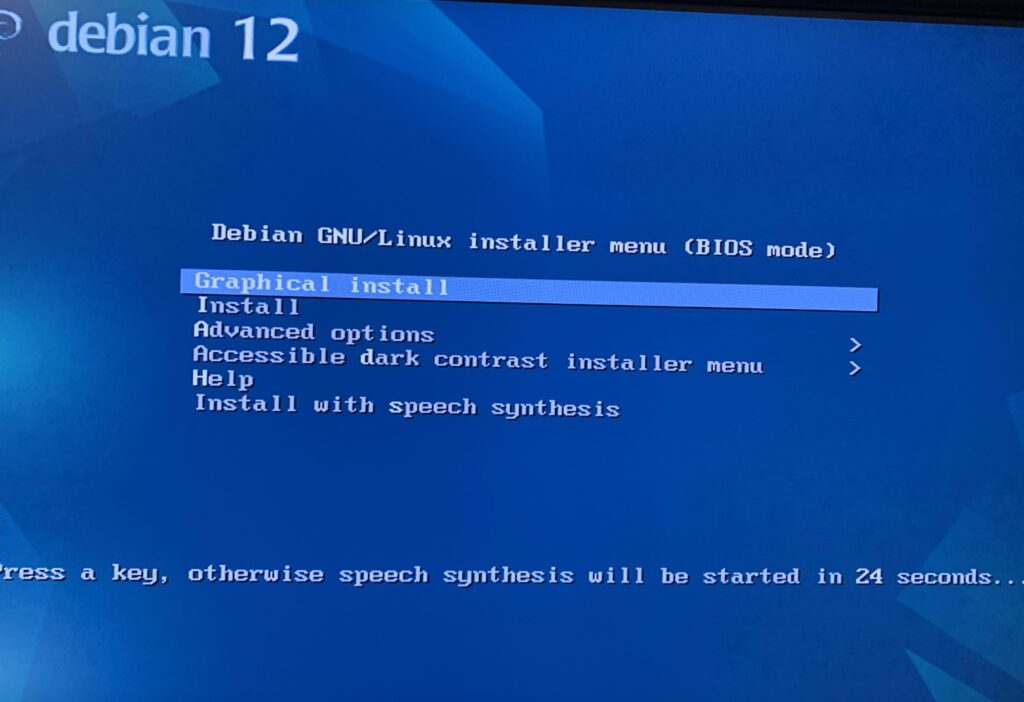
You will hear a ‘beep’ and see the OS installation flow of your chosen OS. Go through the flow. Be sure your ethernet cable is plugged if you want to install GNOME, the Debian user interface. When prompted, install the GRUB boot loader.
Some important settings that you will run thorugh:
- Which language and timezone?
- What is the hostname of the computer?
- This should be something unique and description for each computer
- Which disk to install on?
- What users to create?
- What is the root and user passwords?
- Which extra packages do you want to install?
- In this guide, I install GNOME which is the Debian User Interface.
After installation, install a few boilerplate services; rsyslog for debugging and ssh for connecting to this server remotely.
# upgrade permissions to root
su -
# ** need to input root password **

# update and upgrade all installed software
apt-get -y update && apt-get -y upgrade

# have a syslog to reference at /var/log/syslog
apt-get install -y rsyslog

# have an ssh server running
apt-get install -y ssh

# enable ssh server to automatically start upon computer boot up
systemctl enable ssh

# check that both services are running and healthy
systemctl status rsyslog ssh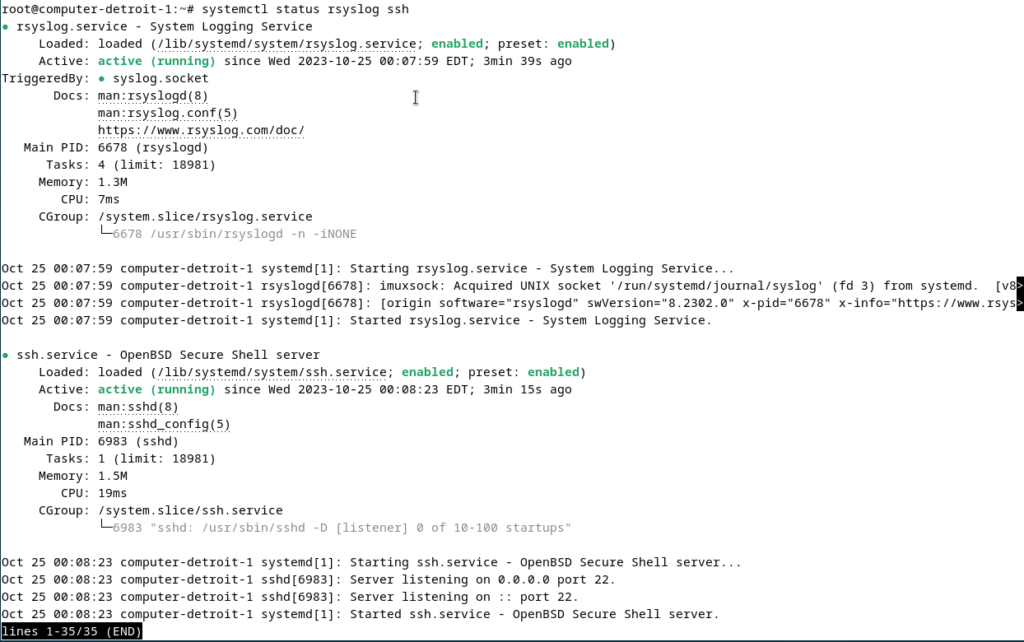
We can see both are running fine. Press ‘Ctrl + c’ to exit.
Enable Auto Login and Disable Hibernation
When running as a server, we do not want the computer to hibernate. We may or may not want Debian to automatically log on to a specific user when the computer boots up. You have two options:
- Run as root
- Run as some less privileged user
From a security perspective it is better to avoid running as root all the time. If you decide to run as root, you can enable hibernation with the following.
sudo systemctl mask sleep.target suspend.target hibernate.target hybrid-sleep.target
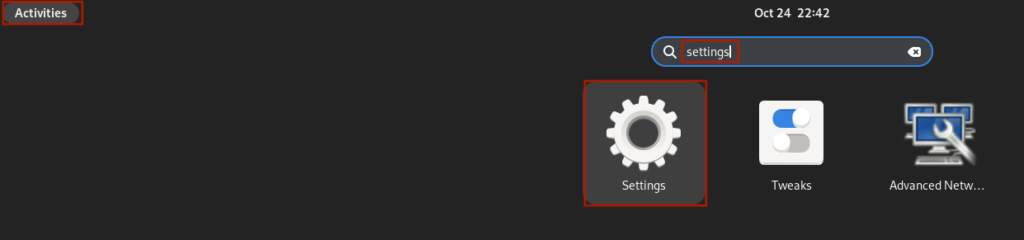
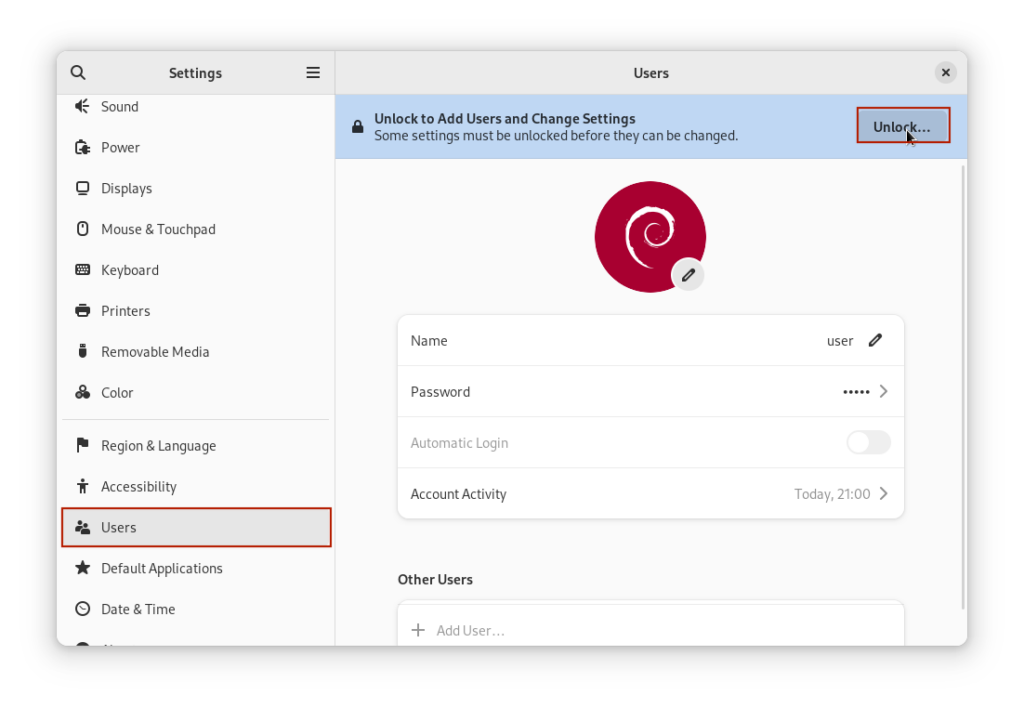
If running as a less privileged user, we can configure auto login through GNOME GUI. First, go to ‘Activities’ in the upper left, type in ‘settings’, and click on the settings gear.
Scroll down on the left hand side menu to users and click ‘Unlock’ to allow changes.
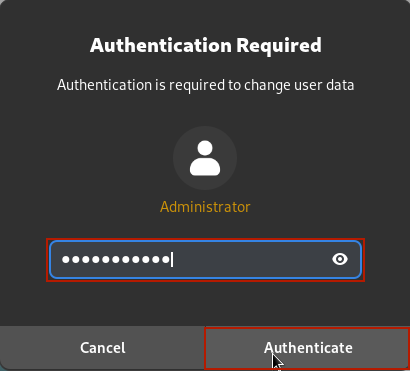
You will be prompted to enter your password. Do so and press ‘Authenticate’.
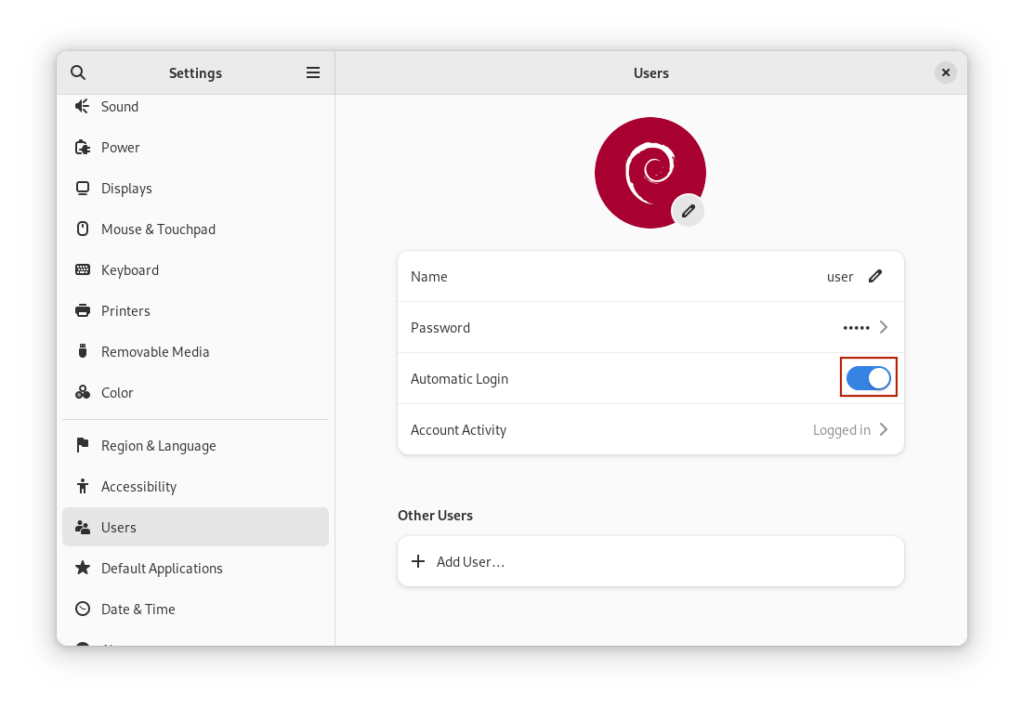
Hit the button to the right of ‘Automatic login’ to enable automatic login.
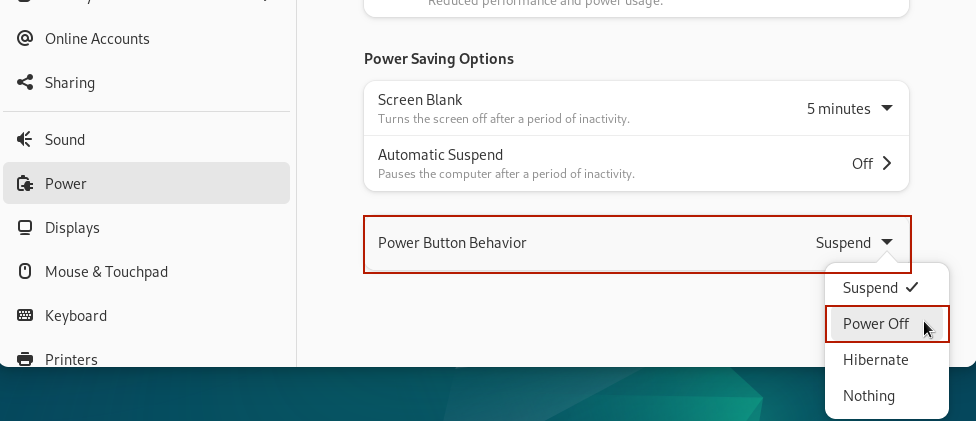
Now, on the left hand side, scroll down to ‘Power’ and click on ‘Automatic Suspend’.
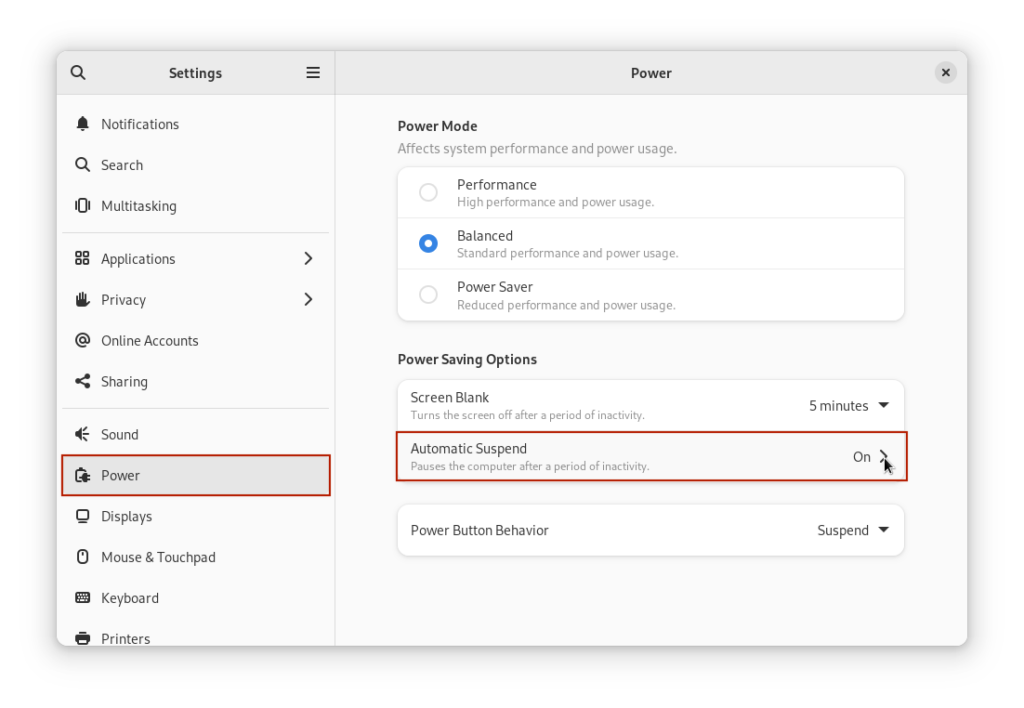
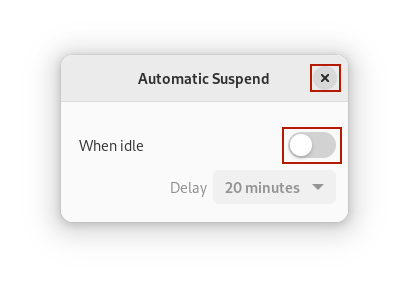
A window will p[op up titled ‘Automatic Suspend’. Click on the button to the right of ‘When idle’ to deactivate automatic suspend. Then, ‘x’ out of the window.
Next, set ‘Power Button Behavior’ to ‘Power Off’. Typically you don’t want servers to hibernate, and this will prevent that from happening.
You can now ‘x’ out of the settings window.
Router DHCP and Port Forwarding
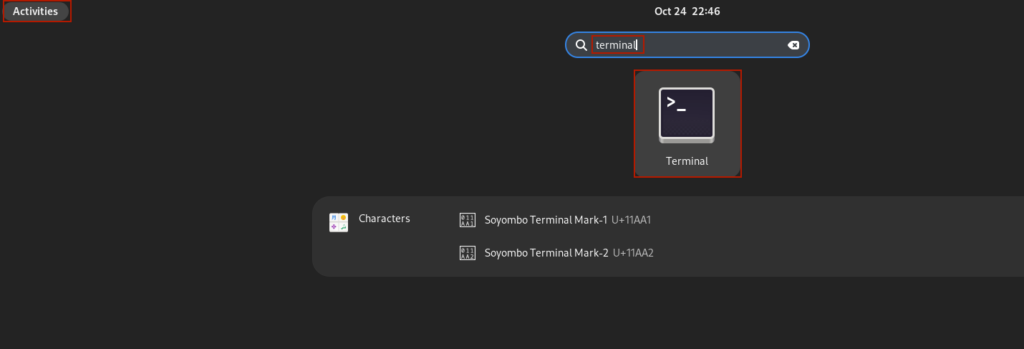
In this section we will use some Debian command line as well as interact with our Router web UI to lock the computer into a specific local network IP and also forward certain ports to this computer. First, go to ‘Activities’ in the upper left, search for ‘terminal’, and click on the Terminal icon to launch Terminal.
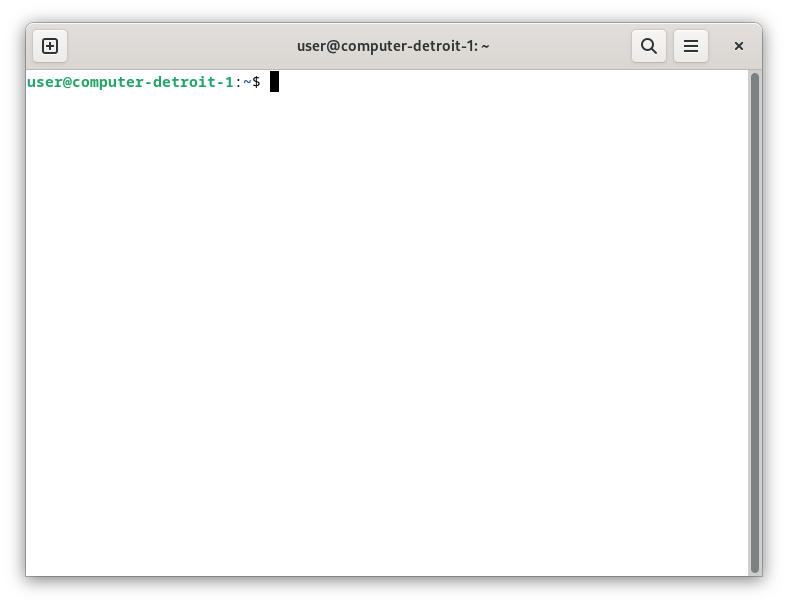
A terminal window will pop up.
Change user to root to have elevated permissions. Type the following into Terminal and enter your root password when prompted.
su -

Take a look at your current network configuration.
ip link show
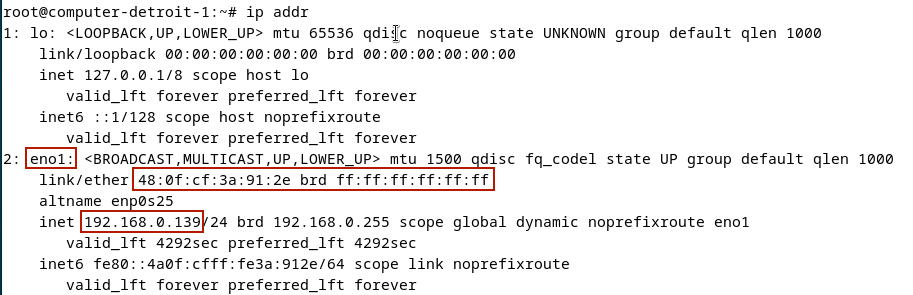
Copy the following data points into a separate text editor.
- The item with ‘BROADCAST’ is the interface name, in this case ‘eno1’
- The text to the right of ‘
link/ether‘ is the computer’s mac address - The text to the right of ‘
inet‘ is the local area network IP
Now, install netplan, and open up a file called ‘/etc/netplan/01-network-manager-all.yaml‘.
apt-get install -y netplan.io
nano /etc/netplan/01-network-manager-all.yaml
Type in the following:
network:
  version: 2
  renderer: NetworkManager
  ethernets:
    eno1:
      dhcp4: true
      dhcp-identifier: mac
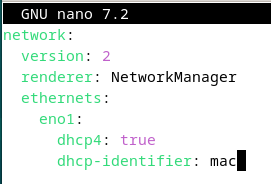
This will instruct your router to assign an IP to this computer based on its mac address. To save and exit nano, press ‘Ctrl + o, Enter, Ctrl + x’. Now, apply the netplan. We expect no output if the application is successful.
netplan apply
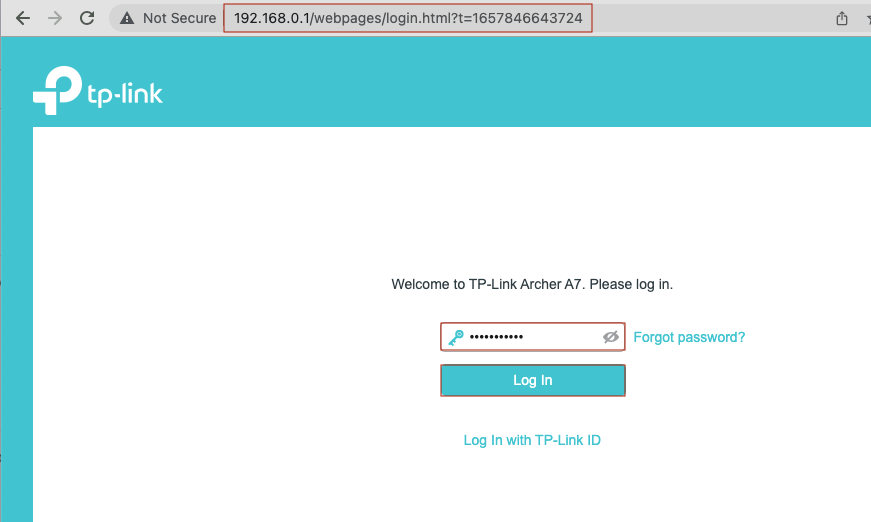
Now, open up a web browser, and go to the URL ‘http://192.168.0.1/‘, which is the default web address for the Tp-Link Archer 7 router web UI. If it is your first time doing this, you will be prompted to create a password; otherwise you will put in the password you created previously and press ‘Log In’.
Navigate to ‘Advanced’ at the top and then ‘Network’ -> ‘DHCP Server’ on the left hand side. You should see your computer under ‘DHCP Client List’, with your chosen hostname, it’s mac address, and the IP address it was randomly assigned.
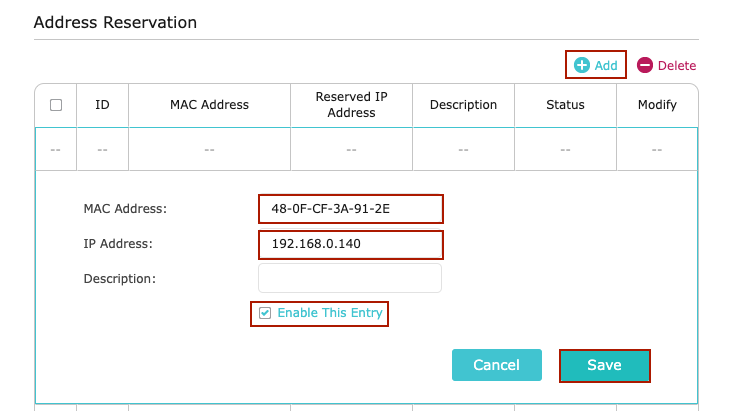
As you can see, the output matches what we saw when we ran ‘ip addr‘ in the Debian terminal. Now, add an Address Reservation for this computer. Available IPs are between 192.168.0.2 and 192.168.0.255. It doesn’t matter which IP you use; the purpose of this is that the IP will always be the same, so you can enable port forwarding. Cclick ‘add’ under ‘Address Reservation’. Then, put in the mac address, a new IP address, check ‘Enable This Entry’, and press ‘Save’.
Now, in the Debian terminal, we can check whether the IP address assignment is working correctly by releasing the current IP, requesting a new one, and checking which IP was assigned.
dhclient
dhclient -r
dhclient
ip addr
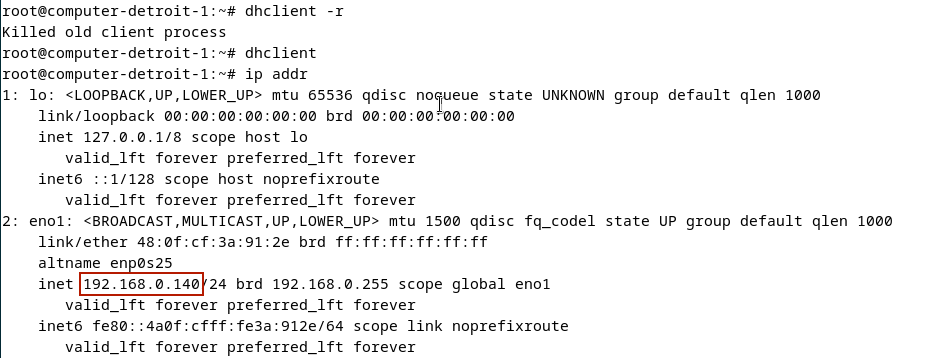
The new IP address is 192.168.0.140 as expected. Now, let’s set up port forwarding so inbound traffic can reach this computer. In the TP-Link Archer 7 web UI, go to ‘NAT Forwarding’ -> ‘Virtual Servers’. Click ‘Add’. In this case, I am enabling inbound ssh access going from port 32 to 22. Finally, press ‘Save’.

Now, we should be able to ssh in from an external IP. But first, let’s verify we can ssh in from another computer within the local area network. In my case, the command is
ssh <debian username>@<ip address>
Since this is the first time ssh’ing into this hostname/ip, you will be prompted to confirm the SHA256 fingerprint. This is a nice security feature and is expected to alarm us on the first time, so type ‘yes’ + Enter to continue.
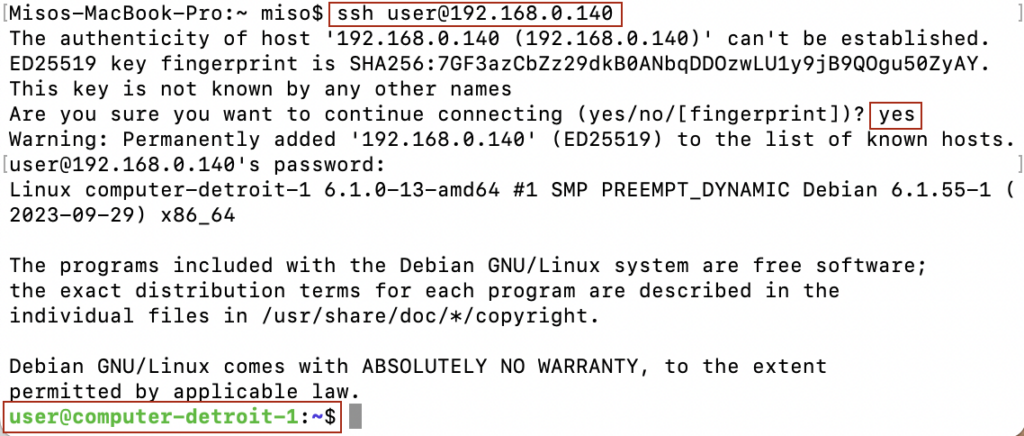
The ssh connection was successful. Type ‘exit’ to leave the ssh session
exit

Now let’s try connecting via your public IP, to verify that your router is forwarding this inbound traffic correctly to the Debian machine. Determine your public IP with the following.
curl http://ifconfig.me

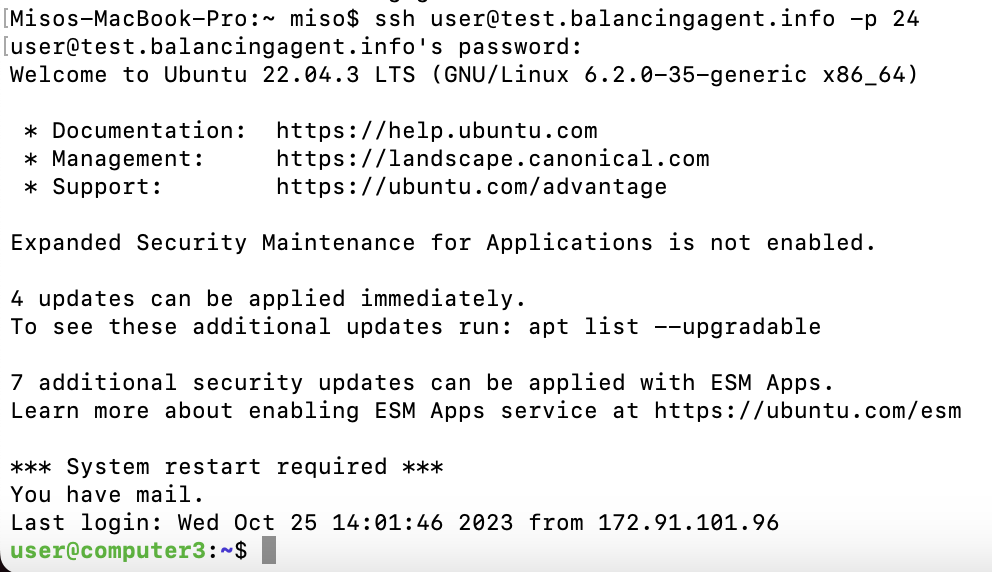
Now, ssh into your Debian box with the following. Type ‘yes’ + Enter to add the fingerprint just as before, and your linux user password when prompted. After successfully logging in, type ‘exit’ to leave the ssh session.
ssh <username>@<public ip address> -p <external port>
exit
Dynamic DNS
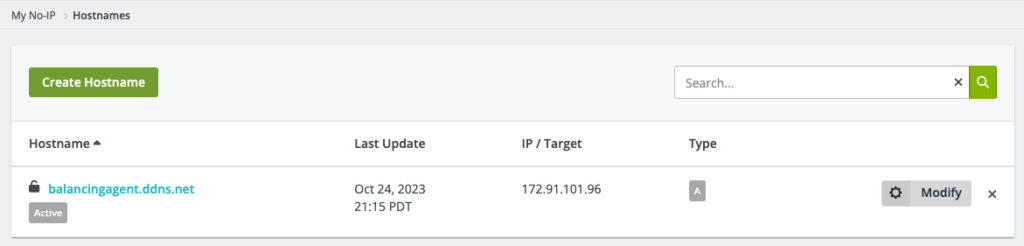
If you are using a residential internet connection or for some other reason do not have a static public IP address, you will want to enable dynamic DNS. This is an integration between your router and DNS so that there is a DNS hostname that always points to your router even as its IP address changes. One free option for dynamic DNS is NO-IP. First, create a free account and register a hostname. You’ll notice NO-IP requires two factor authentication. This is because your dynamic DNS is very sensitive; if someone takes over your NO-IP account, they can control where traffic to your website is sent, and that would be very bad. Here is what my NO-IP hostname looks like.
In your DNS provider, you can create CNAME records pointing at this hostname. Here is an example of a DNS record in GoDaddy pointing the ‘test’ subdomain of ‘techenthusiast.info’ to the hostname provided by NO-IP.

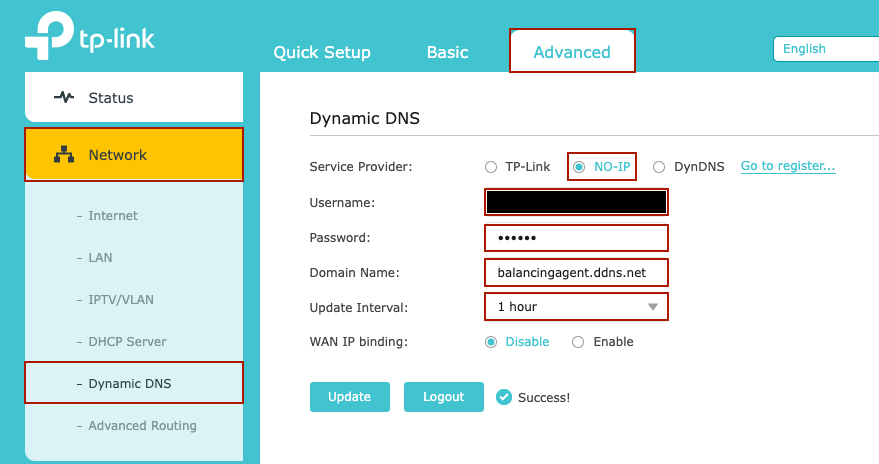
Within the TP-Link Archer 7 web UI, under ‘Advanced’ -> ‘Network’ -> ‘Dynamic DNS’, there is the option to log into NO-IP from your router. Here is what it looks like when successfully configured.
Now, to validate that everything is working, trying doing a DNS lookup on your domain/subdomain that should be pointing to your router. It should give your public IP.
host -t a <your domain/subdomain>

The result is that ‘test.techenthusiast.info’ has a CNAME record pointing to ‘balancingagentagent.ddns.net’, and ‘balancingagent.ddns.net’ has an A record pointing to IP 172.91.101.96.
Now you can ssh into your Debian computer from any internet connection, even when your ISP changes your IP address.
ssh <linux username>@<your domain/subdomain> -p <your external port>
One final test you can run is the renew your DHCP lease with your ISP to get a new public IP address, and see that your NO-IP hostname automatically updates. This can be done in you Tp-Link Archer 7 Web UI, under ‘Advanced’ -> ‘Network’ -> ‘Internet’ and pressing ‘Release’ and then ‘Renew’.
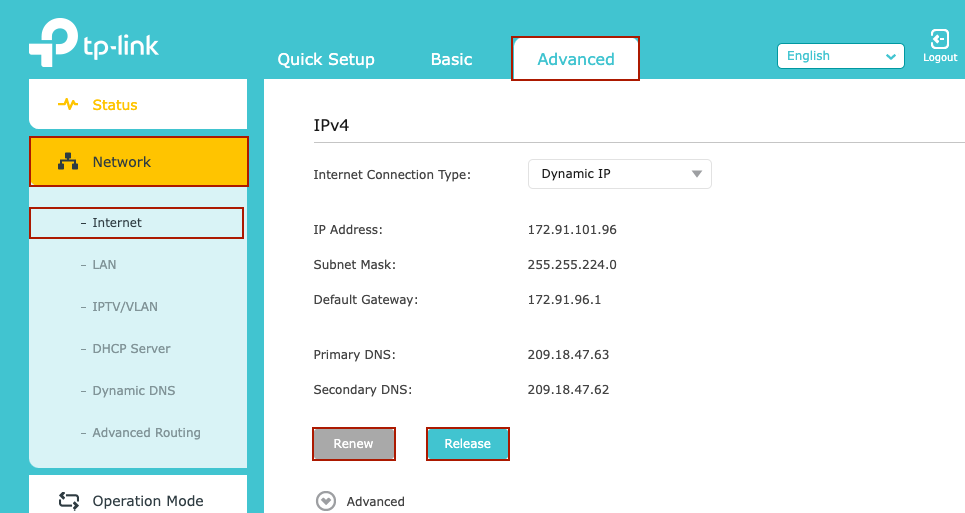
However, you are not guaranteed to receive a different IP address, and if not, you may need to wait until your ISP changes your IP to see that your Dynamic DNS is updating as expected.
Manual Intervention
While we would love these servers to run indefinitely without issue, unfortunately hardware has a non-infinite lifespan. For example, occasionally there will be a disk failure, and manual interaction with the server is necessary to get it started again. When this happens, you will be prompted to do a manual fsck upon startup. All you need to do is type in
fsck <path to disk>
Eventually, the computer should boot up, if the disk can be repaired. Considering this, it makes sense to backup frequently and have redundancy and fail-over for every step of every process.
Leave a Reply